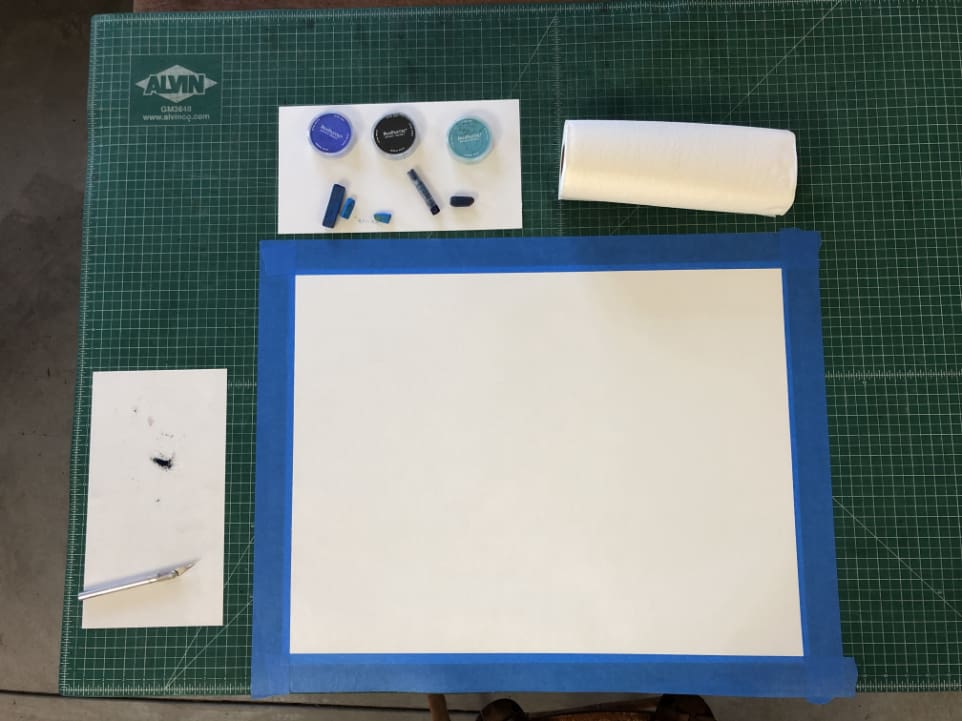
General Preparation: Your paper can be white or any color, and should be at least 45g weight for these techniques. The paper should be larger than the intended piece you will fold from it. This allows you to select the best part of your coloring effort, and the color will be more uniform around its edges.
Cut off the deckle edge of the paper if it has one. Tape the edges of the paper down to a flat surface. Adhere at least a centimeter of the tape’s width to the paper. The 5 cm wide painter’s tape I use is easily removed without tearing paper. The width protects the surface under the paper from your coloring agents. If your color application is likely to be messy, increase the protective width around your paper by taping paper strips around the perimeter. Put a scrap sheet of the same paper nearby to test color on before you add it to your taped paper. Lay out your charcoal, ink, or watercolor, and rags or paper towels.
Charcoal: Inhaled dust from charcoal can be toxic. Wear a mask, and have a vacuum nearby to suck up loose charcoal bits that fall around the perimeter of my paper.
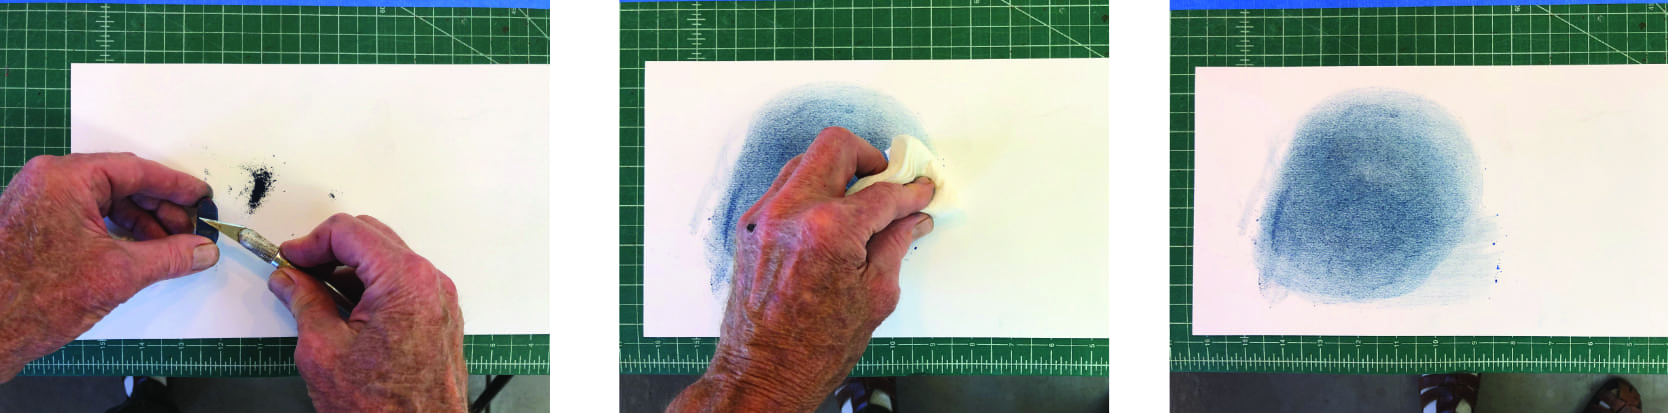
Scrape a charcoal stick with a sharp knife to put the scrapings on your test sheet. Fold a paper towel or cloth into a smaller shape with a cushion in the middle and with soft rounded edges. Place this cushion on the charcoal dust, and rub it into the paper with a circular motion. Add more powder if the color is too light. Repeat the scrapping and scrubbing or adding more colors until you achieve a desired effect on your test sheet. Then use the same technique to color the paper you wish to fold from.
Keep a clean work area. Vacuum up charcoal dust that falls outside your paper. Hold the vacuum nozzle at an angle to the work surface to avoid sucking on to your paper.
Permanency: If you scrape a finger or clean towel across your paper it will pick up charcoal coloring. The color is not permanent or “fixed” to the paper. You will add varnish to the paper to do that.
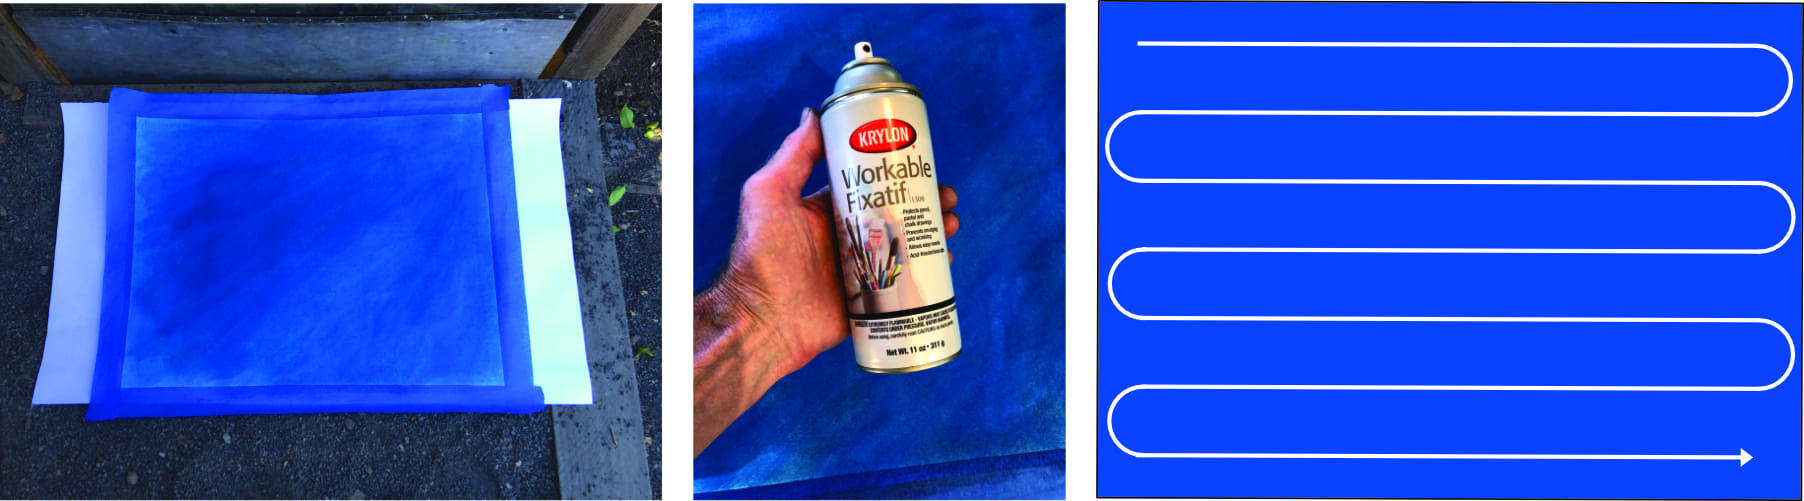
Remove the paper with its tape border from your mat or other surface. Place it flat in a well-ventilated area on a clean sheet of paper or cardboard without much air movement. I leave the tape on the paper perimeter because removing it without the varnish might dislodge charcoal dust I did not pick up with the vacuum. Put on a mask to protect you from inhaled fumes.
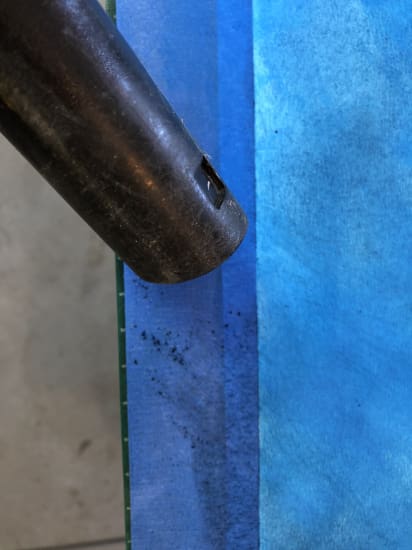
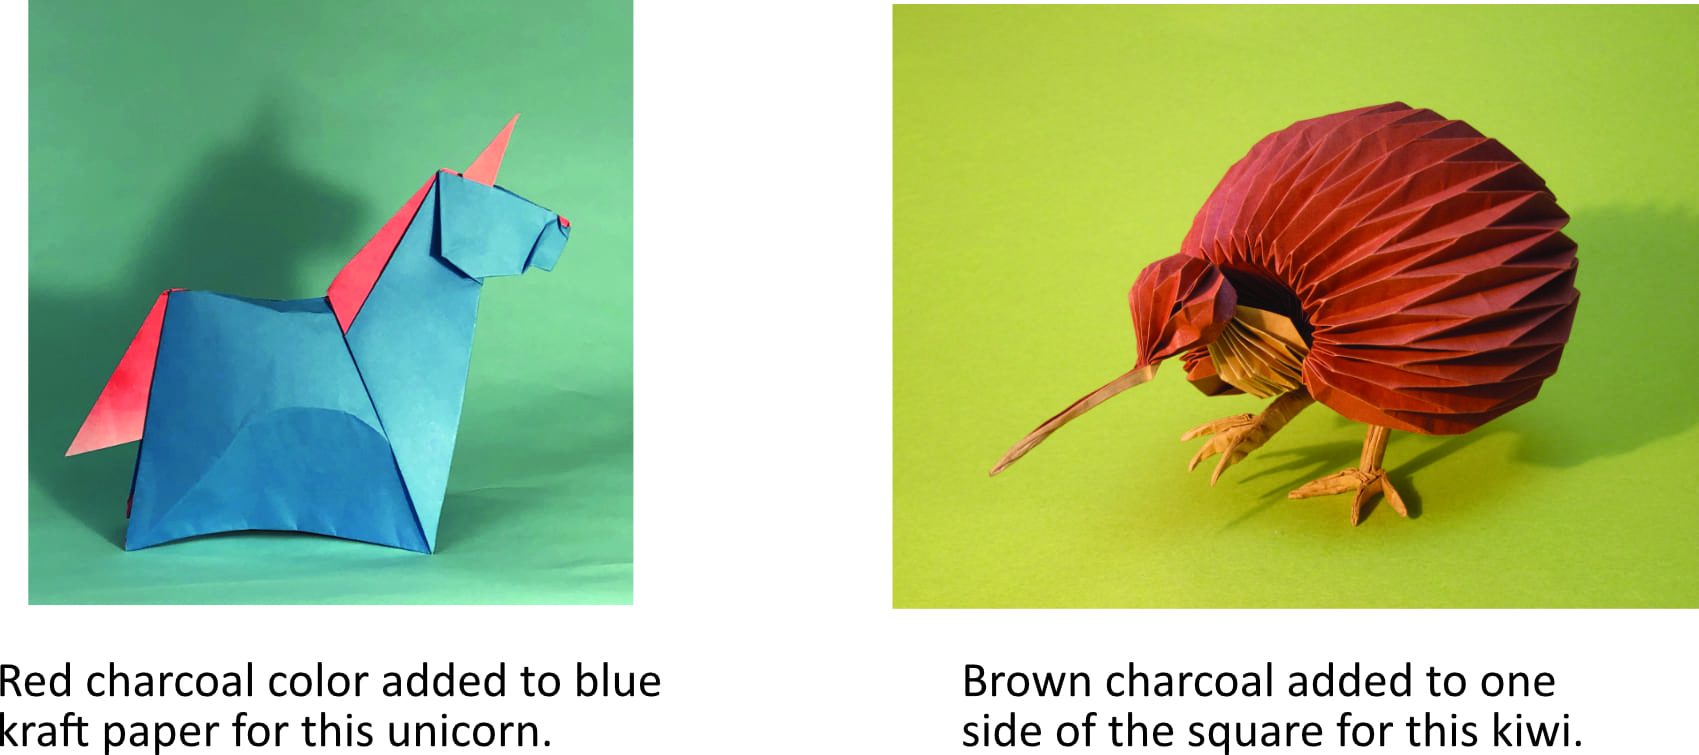
Use varnish specific to fix charcoal or pencil drawings that is available at art supply stores. Hold the spray can 20-25 cm from a top corner of the paper. Depress the spray button and glide the can across the paper according to the schematic drawing. The color will darken and appear slightly wet as you spray. You want a light coat of varnish. Do not let the varnish puddle up. If your paper darkens rapidly and appears very wet, move your can more rapidly or increase the distance from the can to the paper. Let the varnish dry for an hour. Test the surface by scrapping a finger or paper towel over it. If you pick up color, apply a second light coat. Let that dry completely before retesting its permanence or applying additional varnish coats. When you no longer can pick up color, carefully remove the tape from the paper and cut your final shape from the best part of it. Here are some examples of the technique:
Ink: Try the same process using ink, but without the varnish coats. I use paper 80-300 g weight for ink coloring. Pour a puddle of ink on the paper. Drag the color around the paper with a rag or sponge. Work quickly to avoid creating wrinkles from too wet paper.

Apply more ink next to colored areas that are still wet to get an even color. Dampening large paper pieces slightly with water before ink application can help make the color more even. The paper on the right had an even application of ink thinned with water and more ink brushed on top for a dramatic effect.
Water Color: I do not to use water color on papers less than 250g weight because the amount of water in this medium can wrinkle taped paper. It can also separate it from the tape. I explain below how I use a flexible mat to remove wrinkles from a fairly large sheet of lighter weight paper (Canson). If you try this, make sure your tape is pressed firmly on to the paper. A more even color can result if you dampen the paper slightly from a spray bottle before applying the paint to it. I like to use a sponge or a rag to apply the color quickly. The paper buckles or wrinkles soon after water color is applied to it. Slightly wrinkled paper can become flat again when it is dry. My test sheet (below left) looks beyond repair.
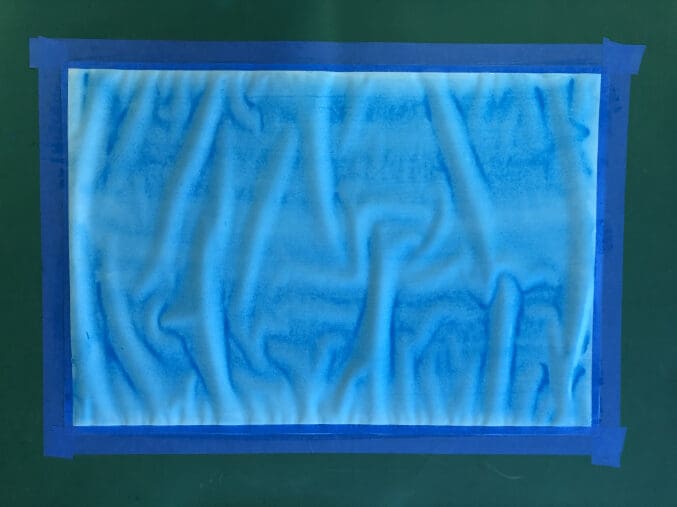
Paint has pooled in the grooves between wrinkles. Even if I like this look, the wrinkles will be permanent when the paper dries making it hard to fold.
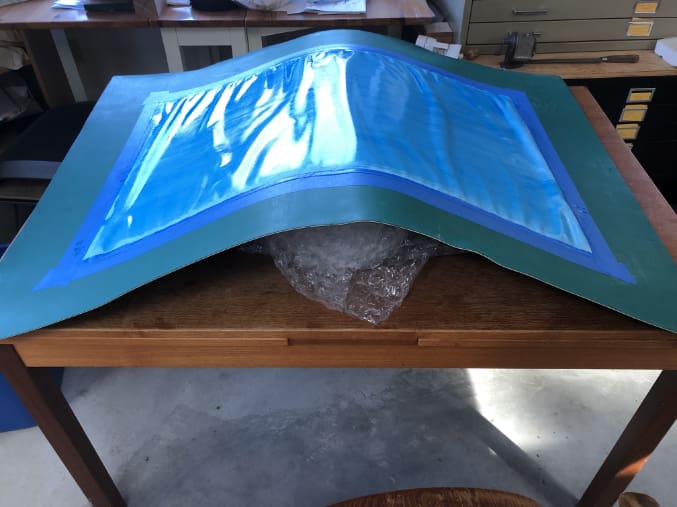
Placing an object under the mat to create a dome can stretch out wrinkles in small sheets of paper, but not sufficiently for this larger one. Take advantage of the reduced wrinkles from the domed surface to spread the paint more evenly.
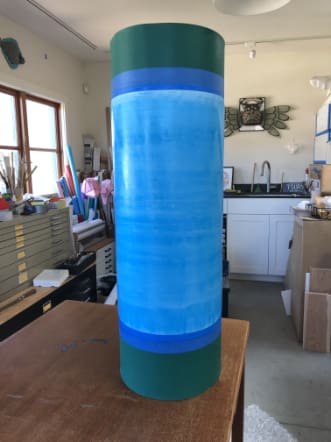
To flatten the paper, create a tube out of your mat by taping together two of its parallel edges together. Stand it up vertically to dry the paper. When dry, remove the paper from the mat. There is no need to varnish it for permanency.
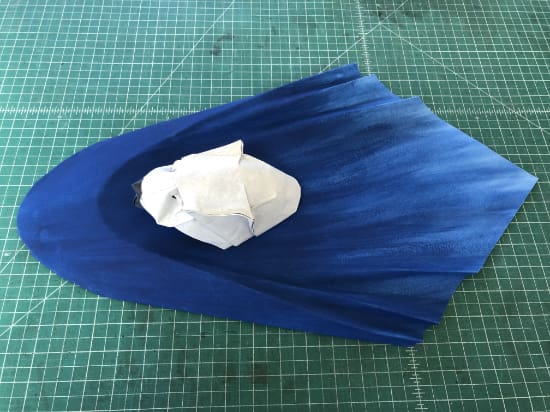
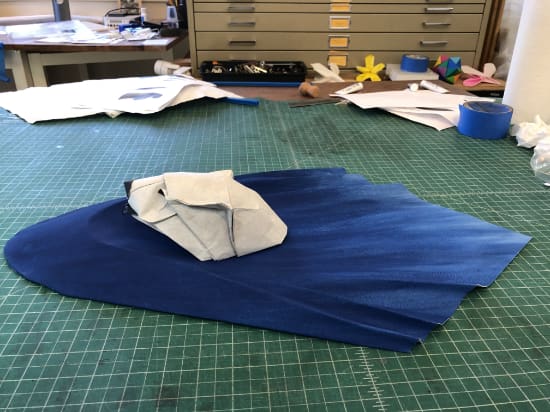
Combine techniques: Coloring rough surfaced paper with charcoal can leave the color on the top surfaces of the bumps in the paper and not in the troughs. This can be desired to create a textured effect. If you want to color the troughs, use watercolor or ink first followed by a top layer of some other color agent. The water paper in “Polar Swim” (above) was first colored in ink followed by a top layer of charcoal.
Rubbing: The walls of my basement house in Montana were decorated with plant motives using a technique called stenciling. I adapted this technique to use with rubbed charcoal for a piece I called “Bear Protector of the Mountain”.
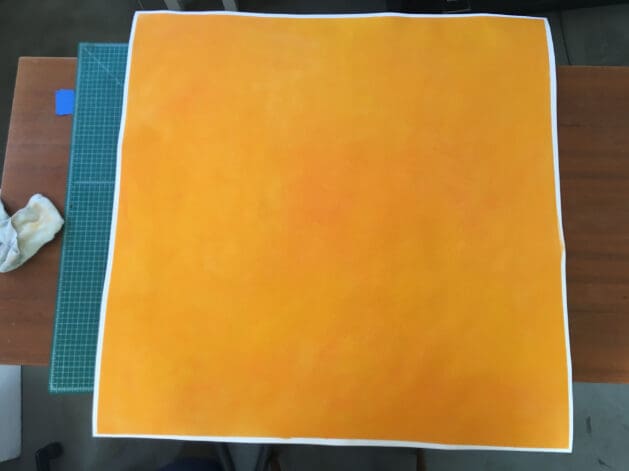
I first colored a large sheet of Arches watercolor paper with yellow charcoal (size 112 cm square).
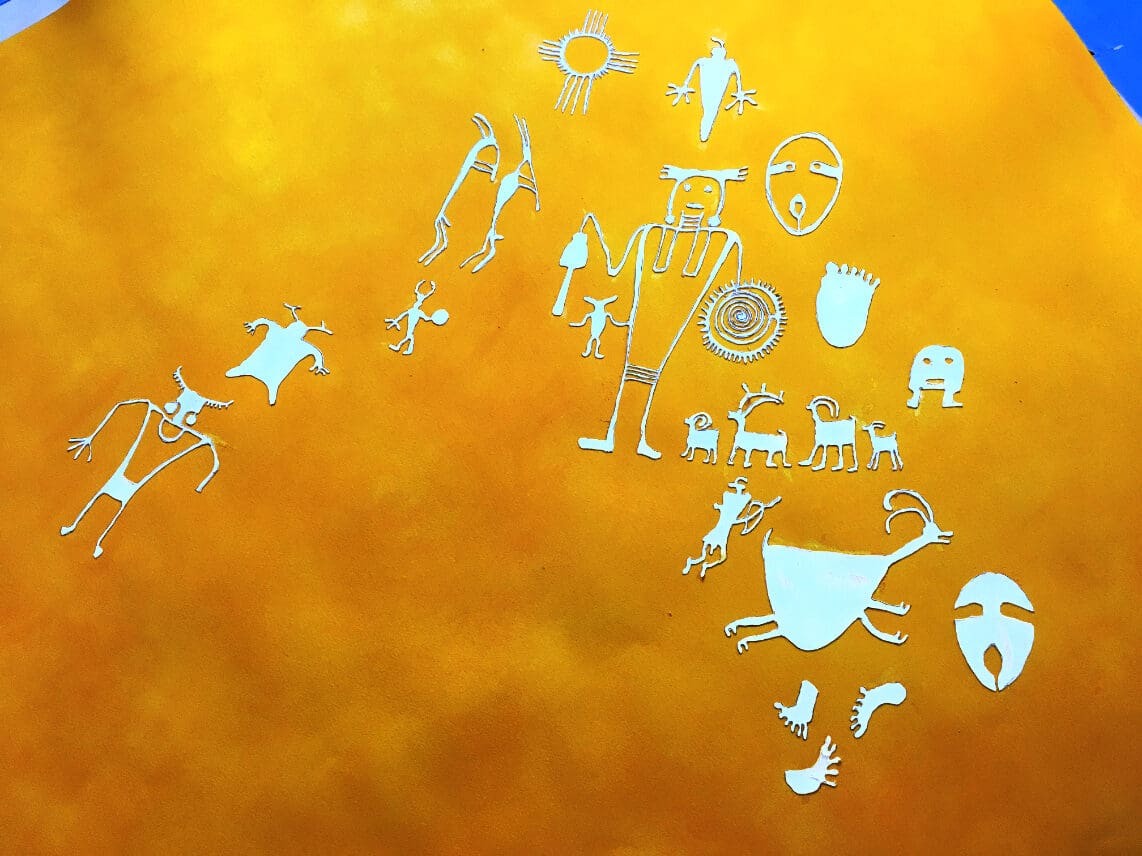
I then cut out figures from manila folder paper. These figures were displayed originally in ancient rock petroglyphs from the southwest United States. I painted the backside of these figures with water color masking liquid and immediately pressed them on the front of the paper. The masking liquid acted like a weak glue. I could have used rubber cement.
I rubbed red charcoal dust around the edges of the figures with a stiff bristled brush. I removed the paper figures to reveal their image with no red charcoal coloring. A second coat of charcoal was rubbed over the entire paper surface to reduce the contrast of the figures with the background and “fixed” with varnish.
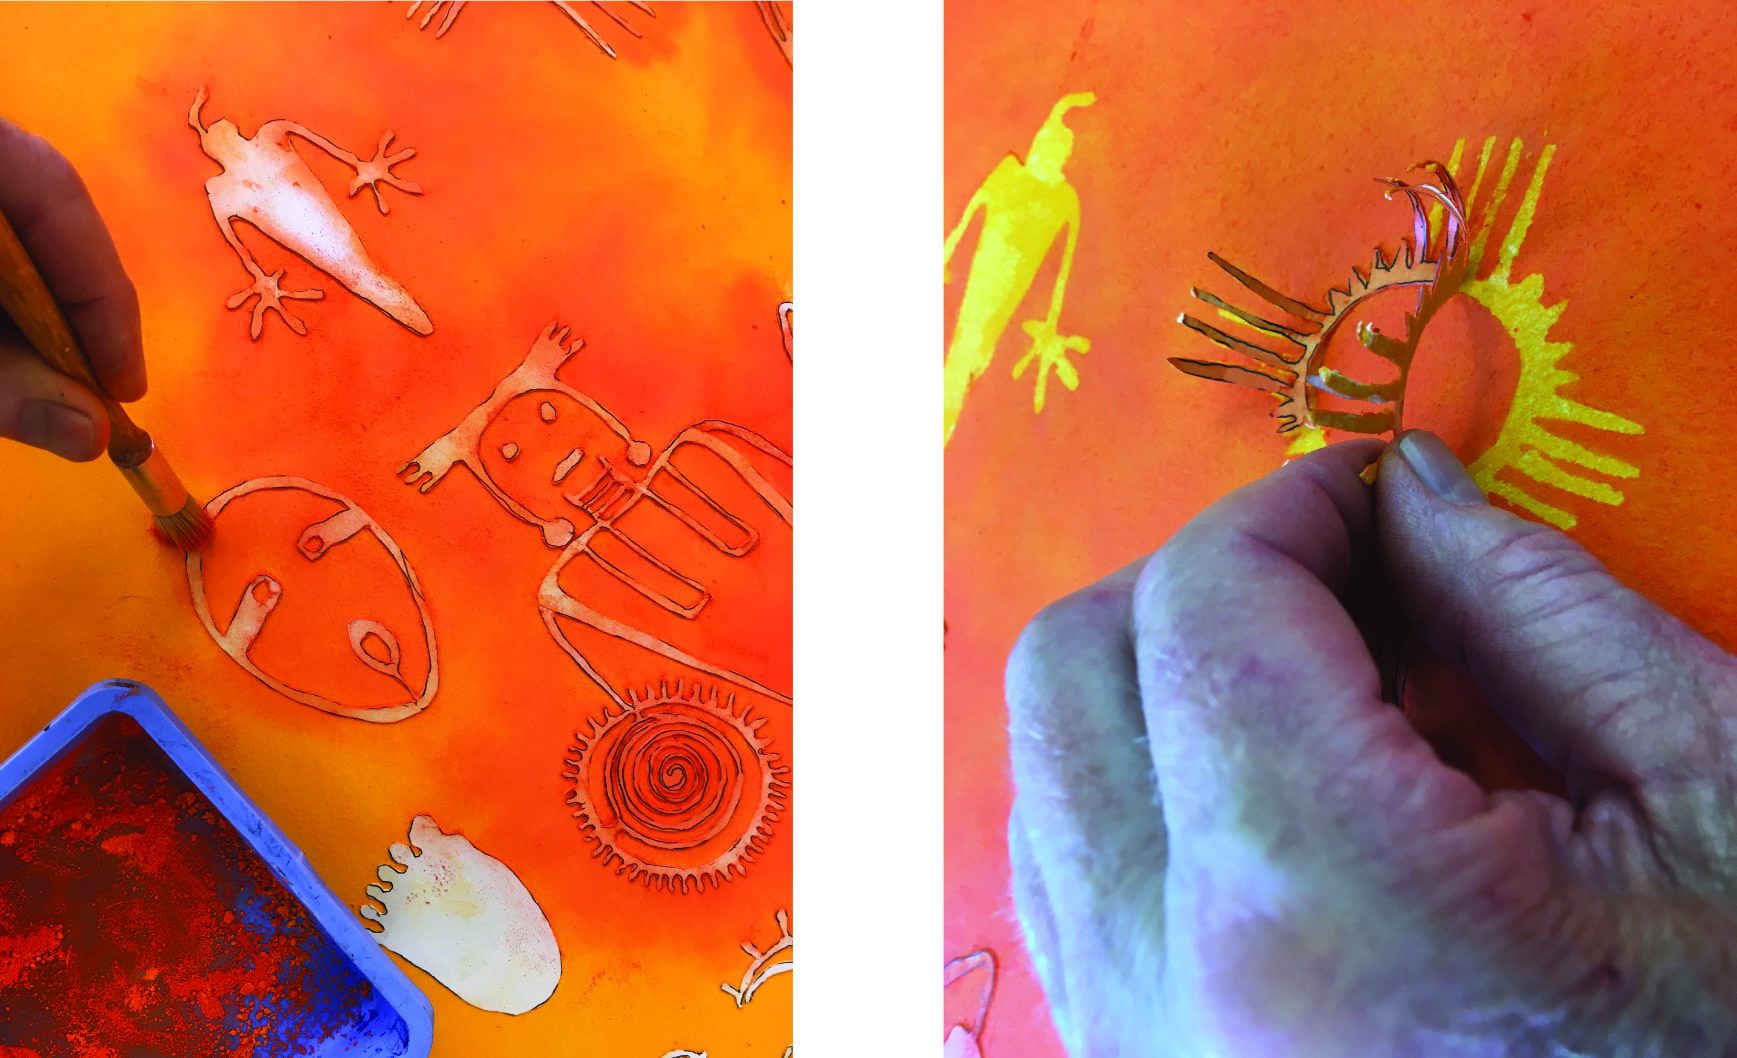
I coated the back side of the paper with black ink. The paper was ready to be wet-folded.
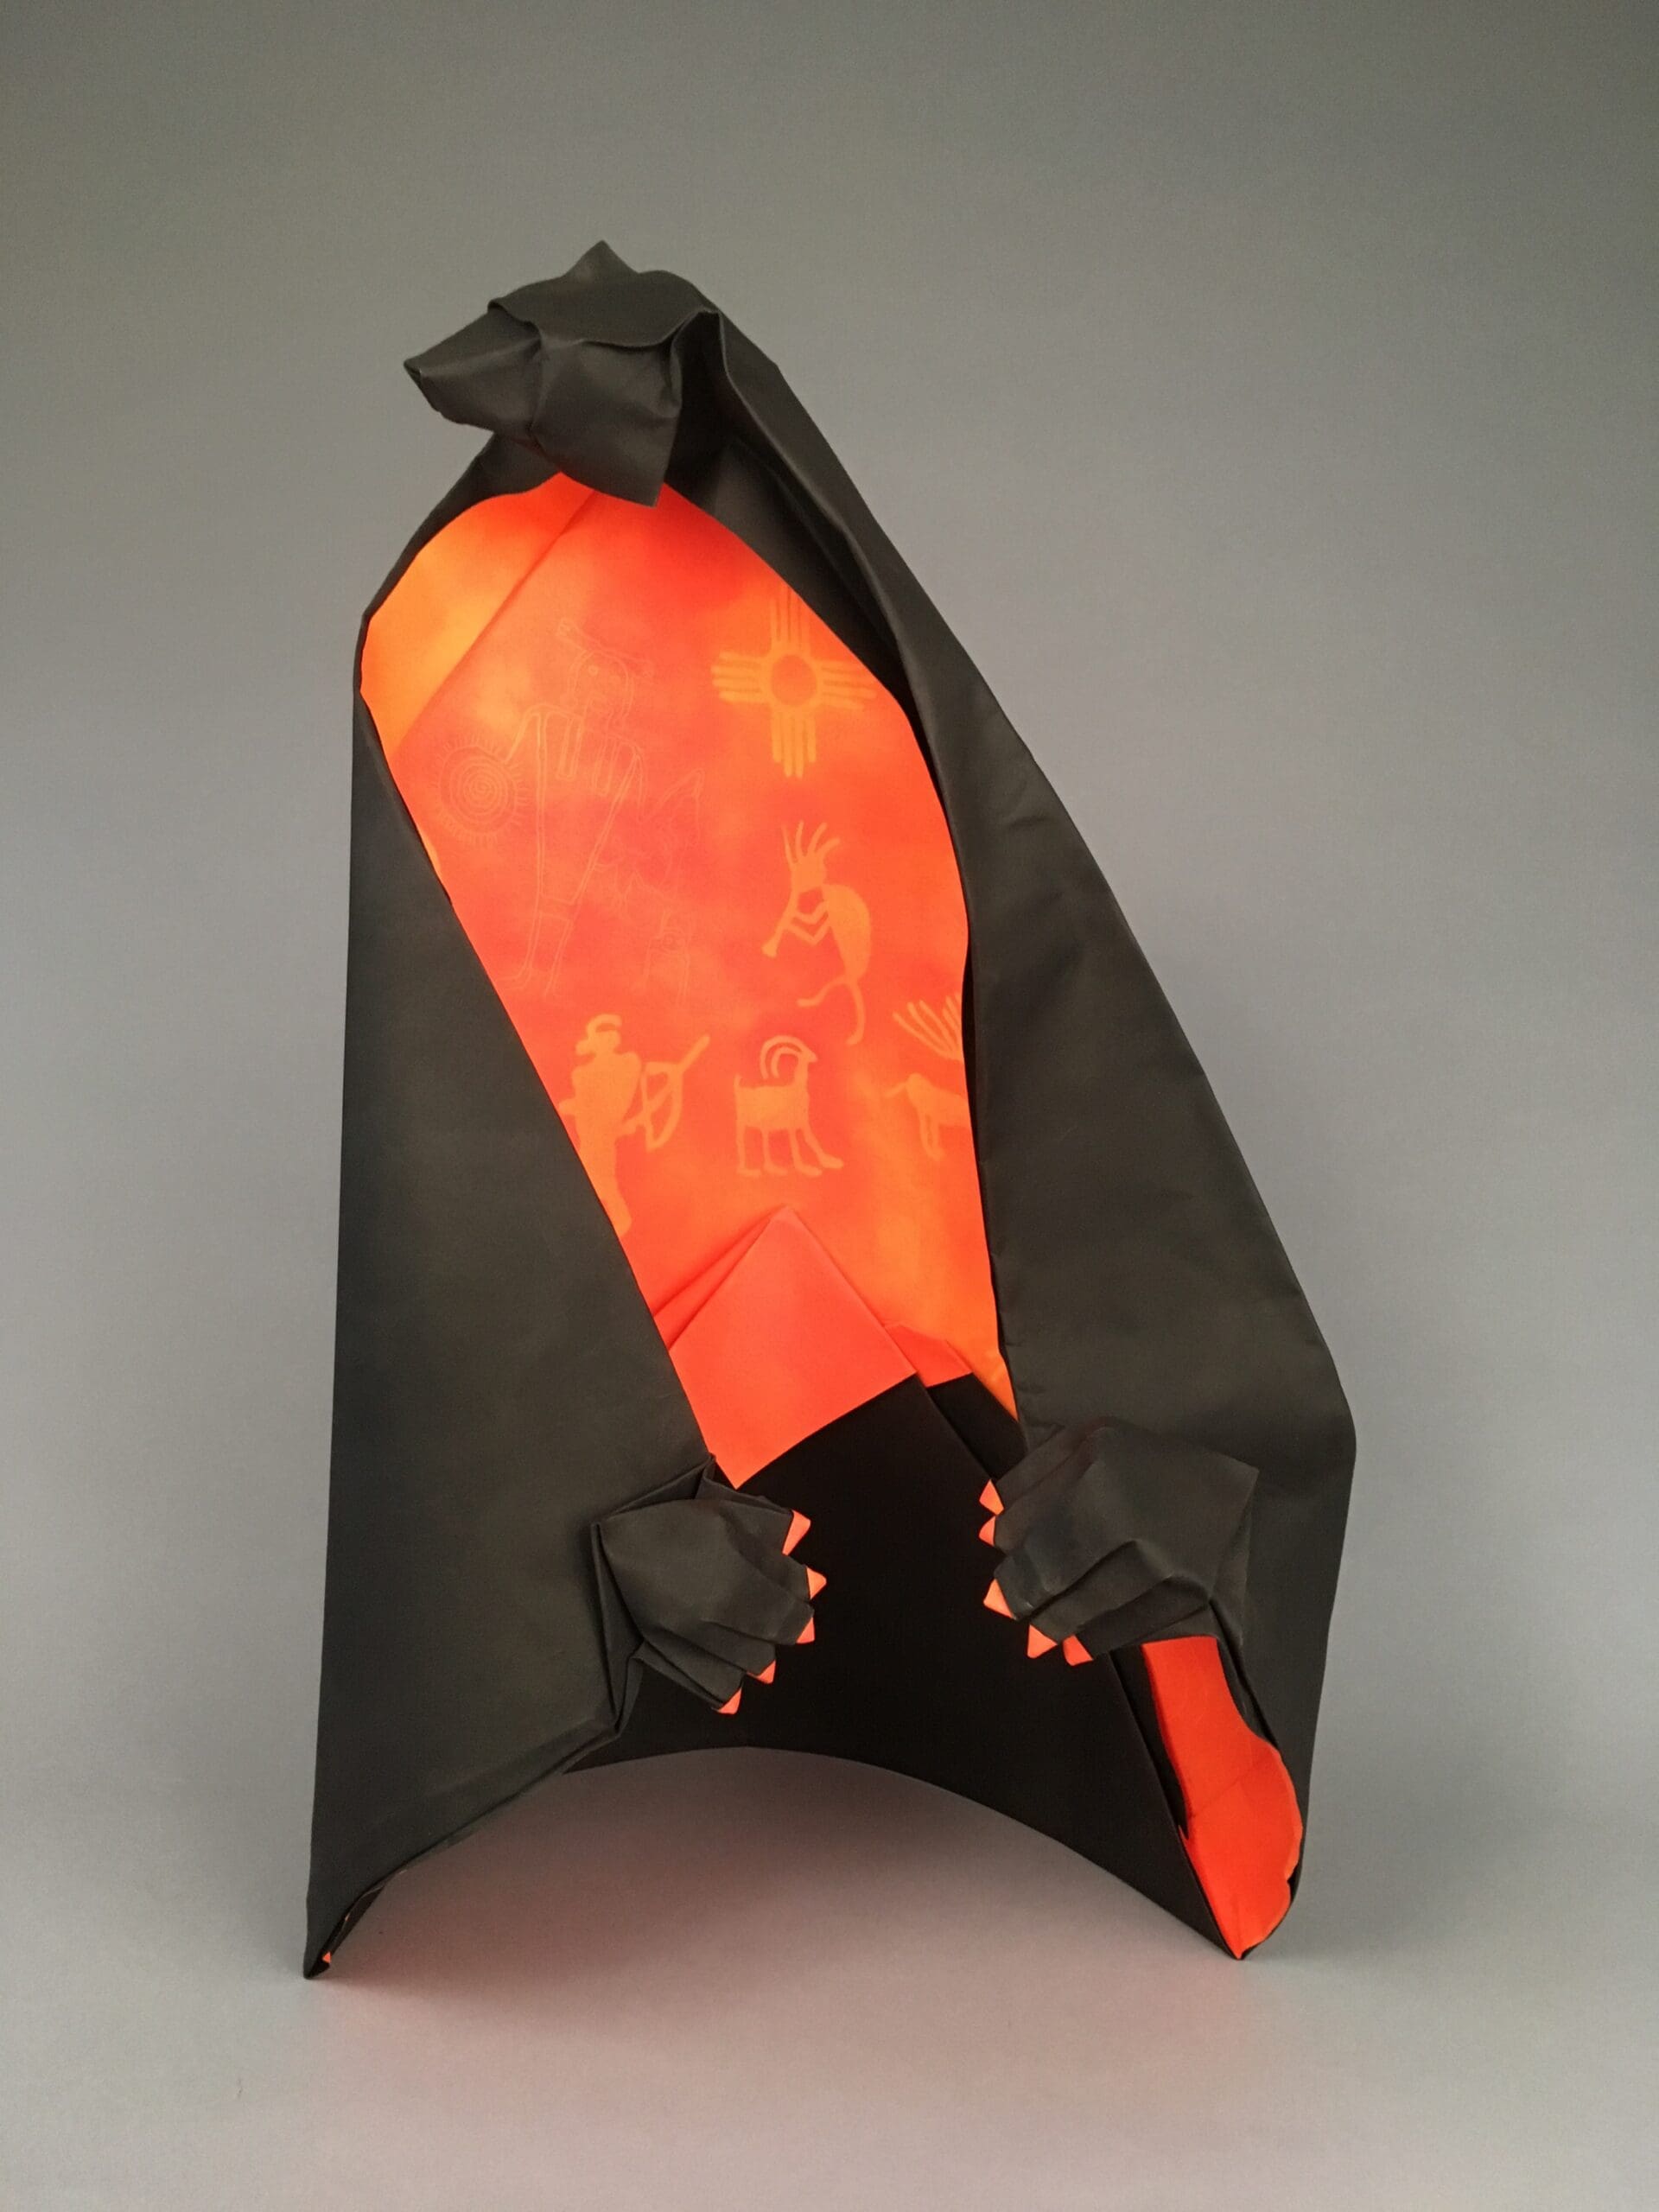
“Bear Protector of the Mountain”