Few things are more frustrating than months of your work time making origami art being destroyed in shipment, or having to display someone’s creation that lacks a means to stand up. Whether you are the artist or the curator, both are avoidable. Here are some tips from more people than Bernie Peyton. This is not an exhaustive treatment of the subject. I welcome your suggestions on these subjects.
DISPLAY
Plan how you are going to display your origami when you design it. If it is meant to stand on its own, make sure it has sturdy parts that touch a surface. Wet-folded thick paper produces strong origami that supports itself over time. If it is meant to hang, make sure there is hook, ledge, or wire to do so and that gravity will place it in the right position.
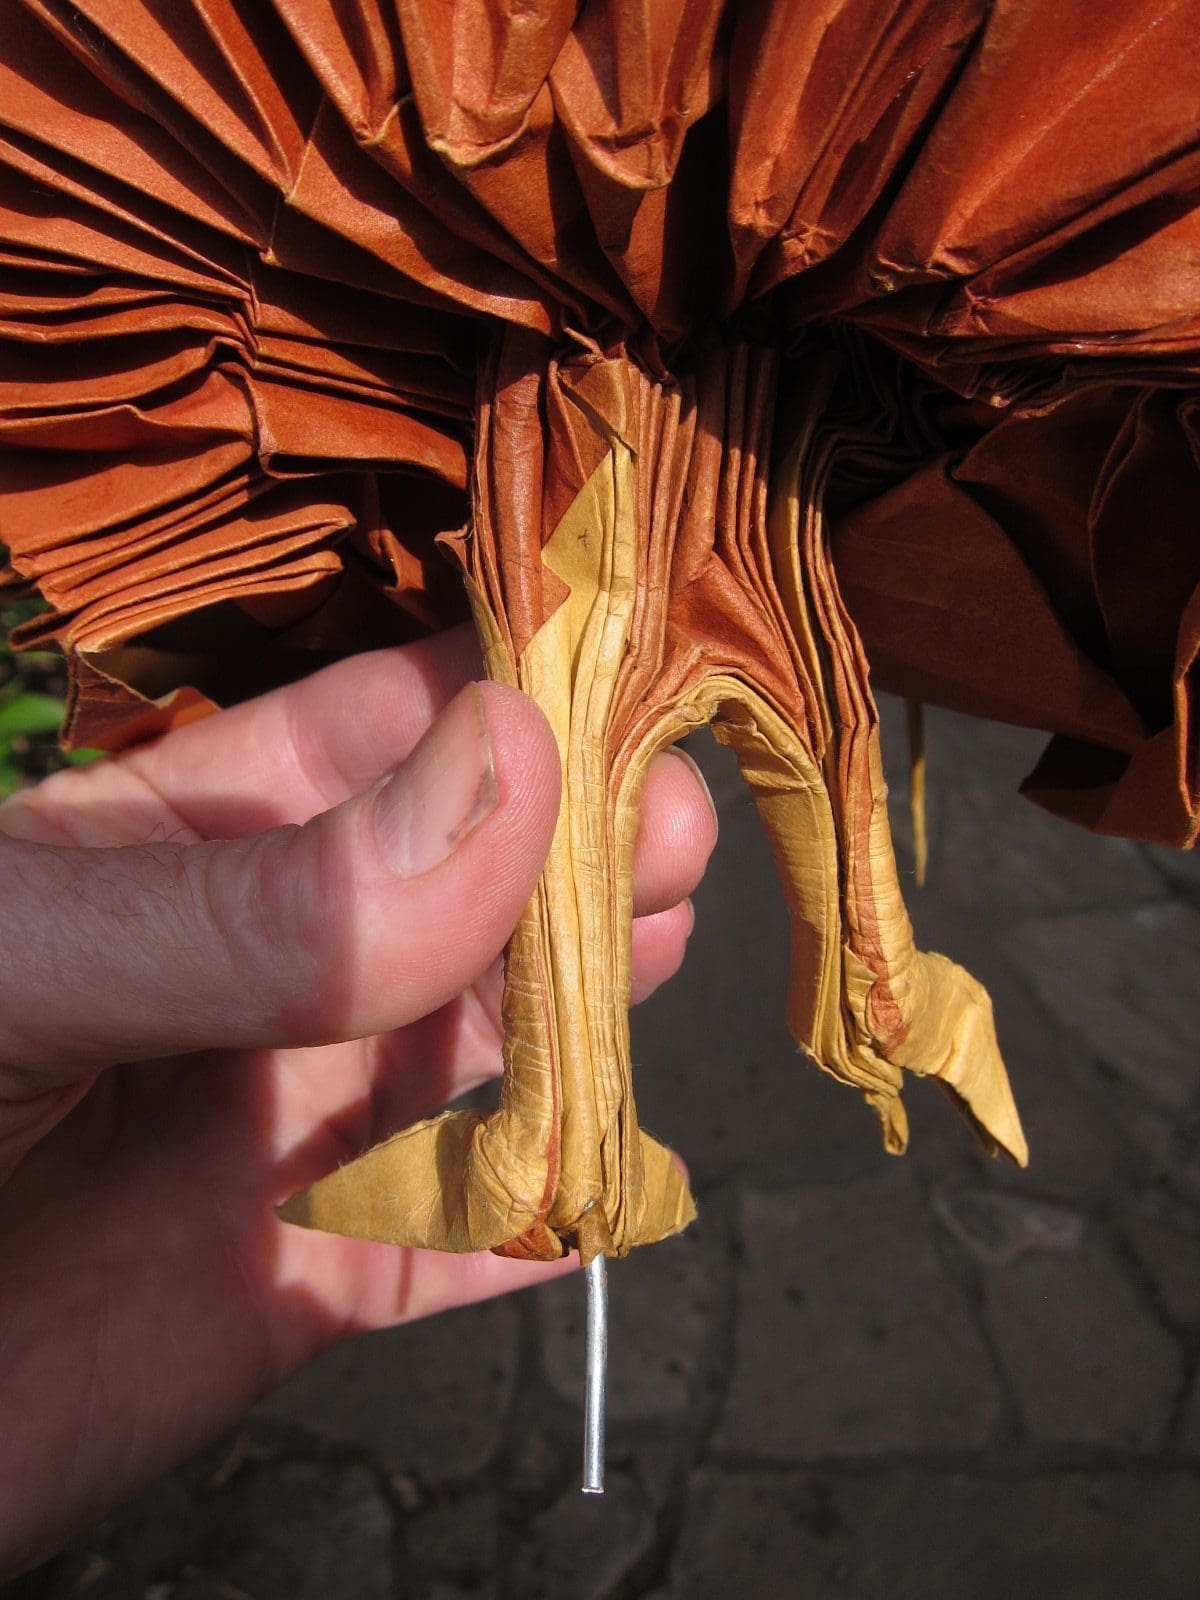
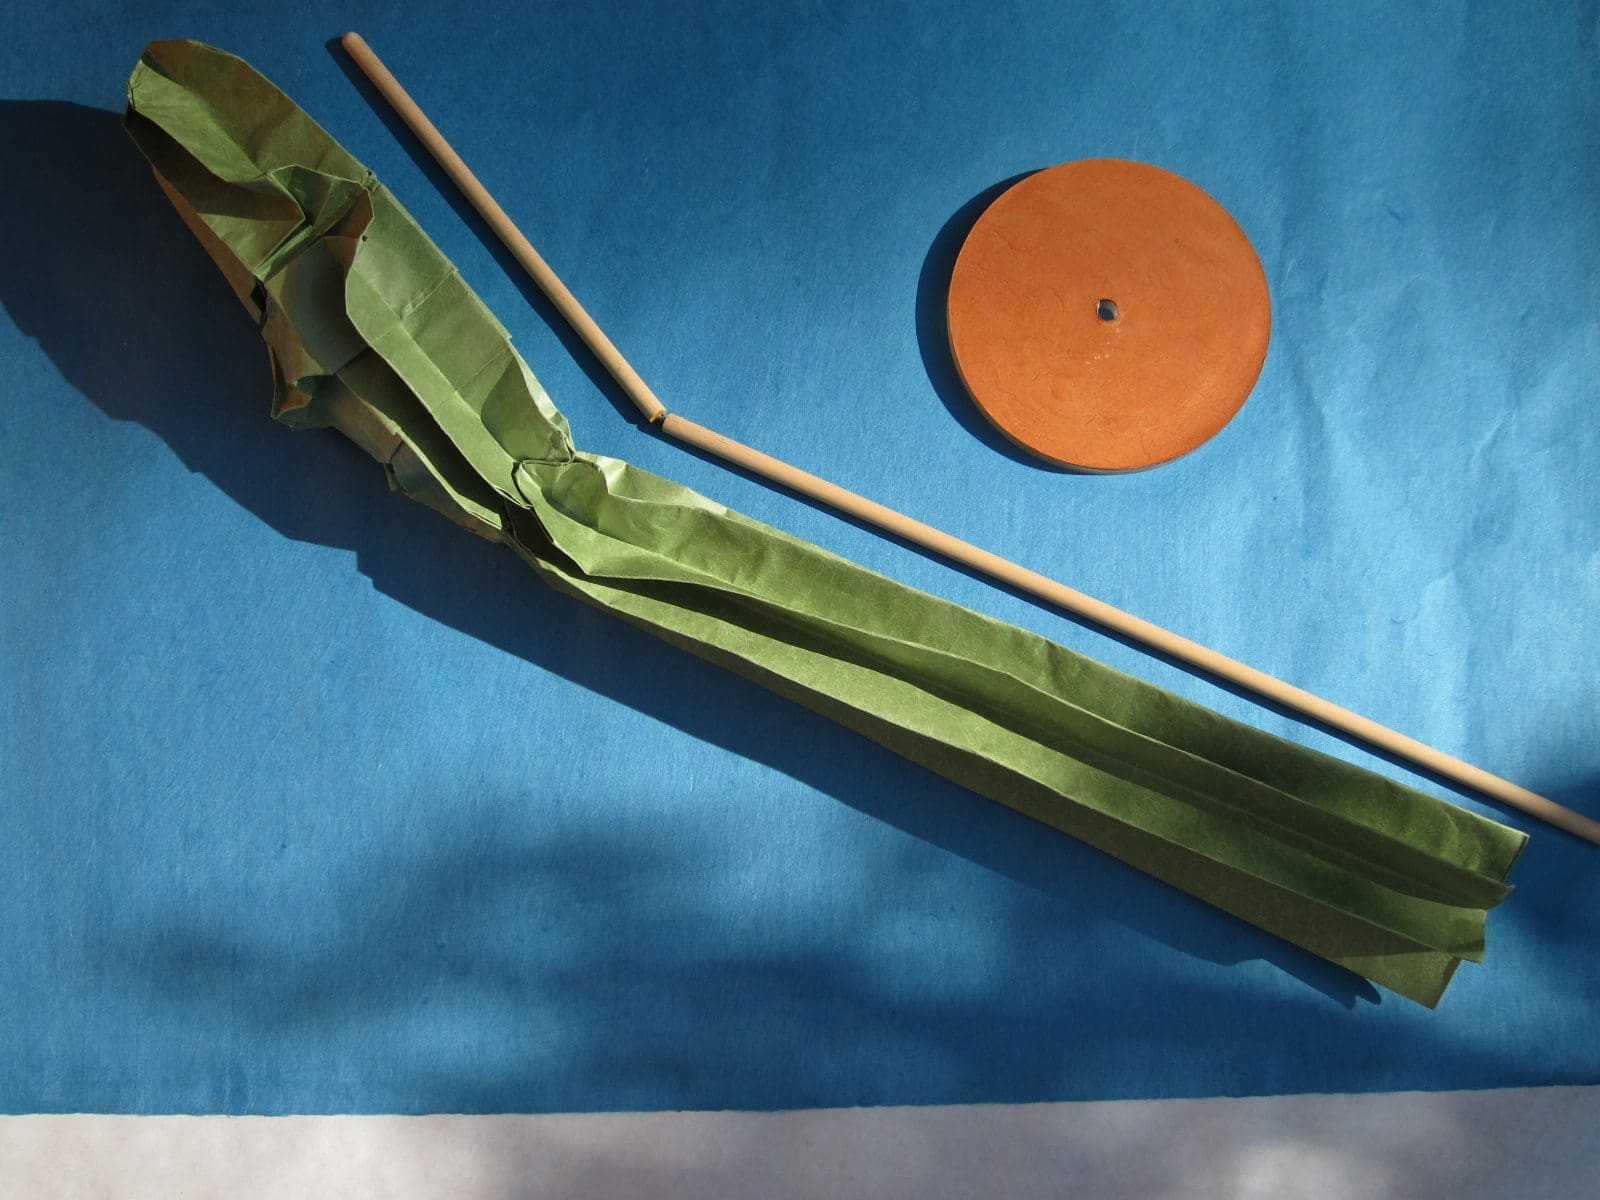
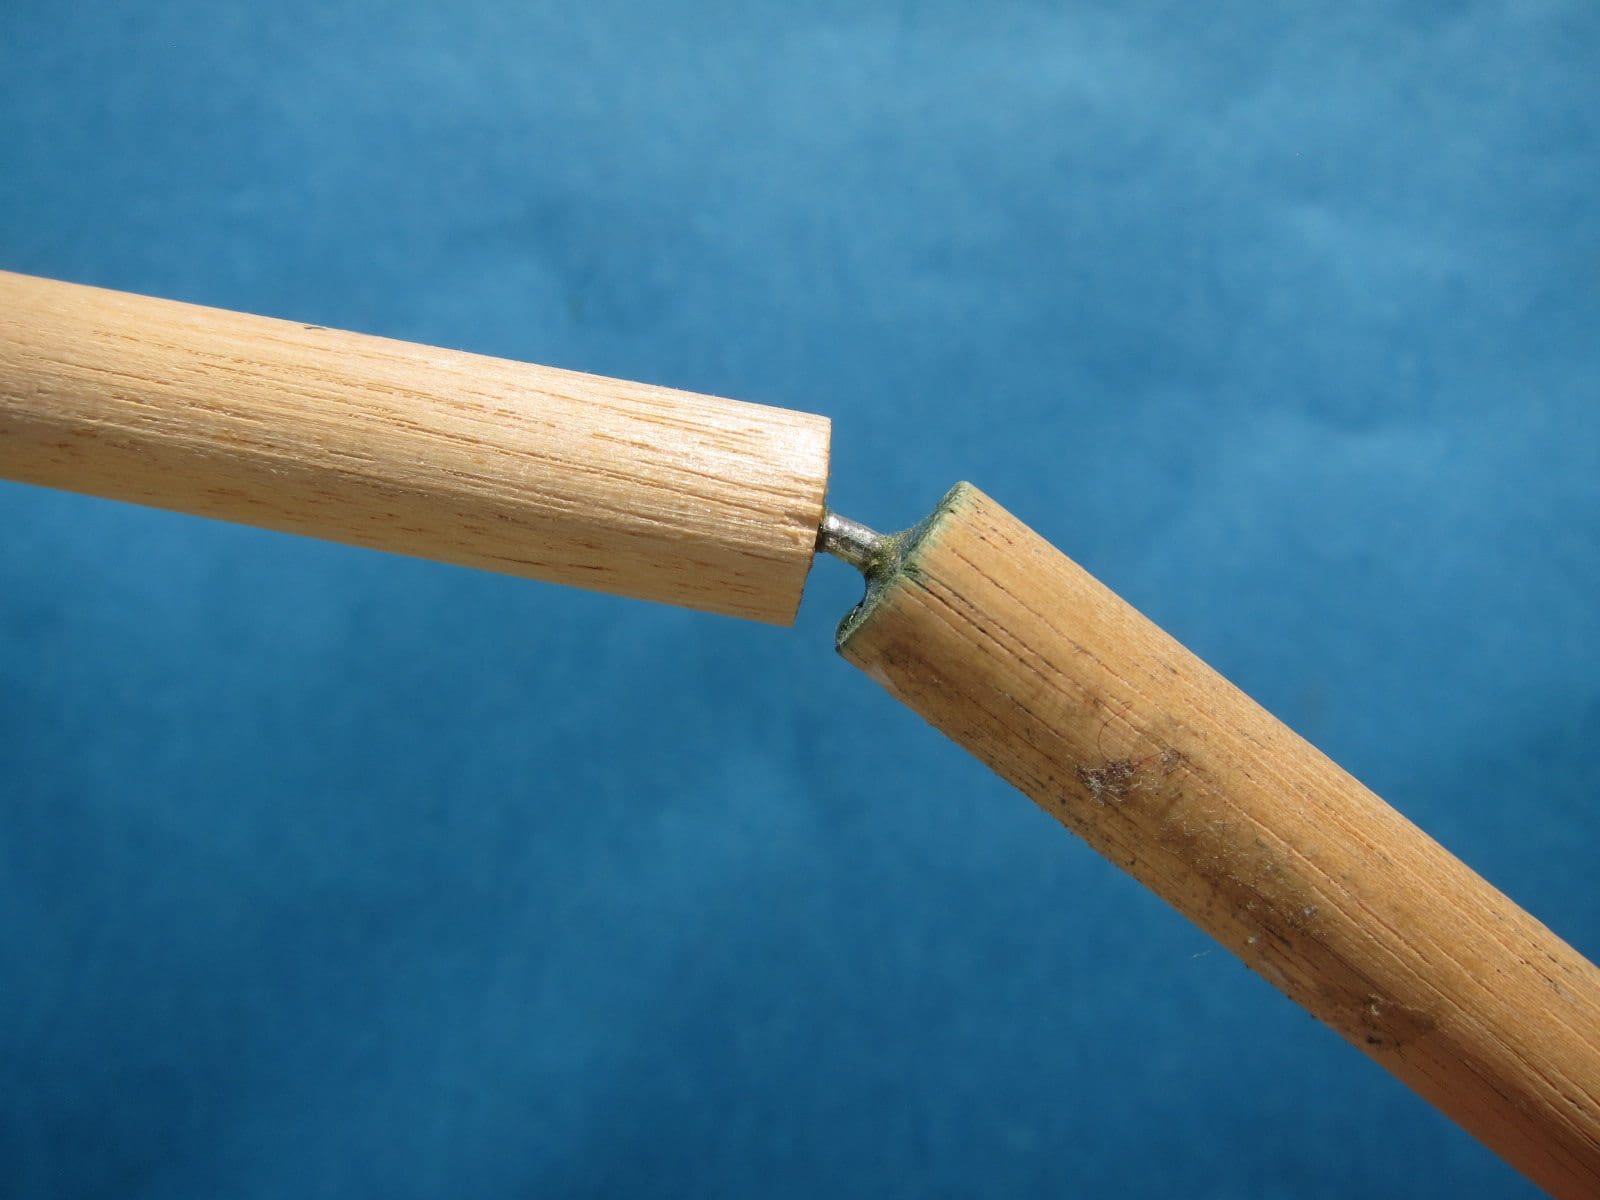
Armatures can be incorporated in models that need extra support. Plan the placement of these when you design the model. I insert wire armatures during the folding to impregnate them within the model. For example I fold leg layers around a wire when narrowing it. This results in an especially strong bond when wet-folded paper dries. Ends of these wires can be placed in holes in a base to allow the model to stand. Have enough wire protruding from your model to keep your model rigid on its base.
Try to keep wires inside many paper layers. Wires placed just under a paper’s surface can be visible or create a crease on the top surface. Bend all free wire ends into a tiny loop to prevent them from piercing paper. Do not use wire that rusts. If there is no possibility of placing a wire inside the model, you can epoxy glue a wire to the outside of a “leg” or flap, and then cover it with a strip of the same paper.
Wood works especially well to support paper. I save and wash chopsticks and coffee stir sticks for this purpose.
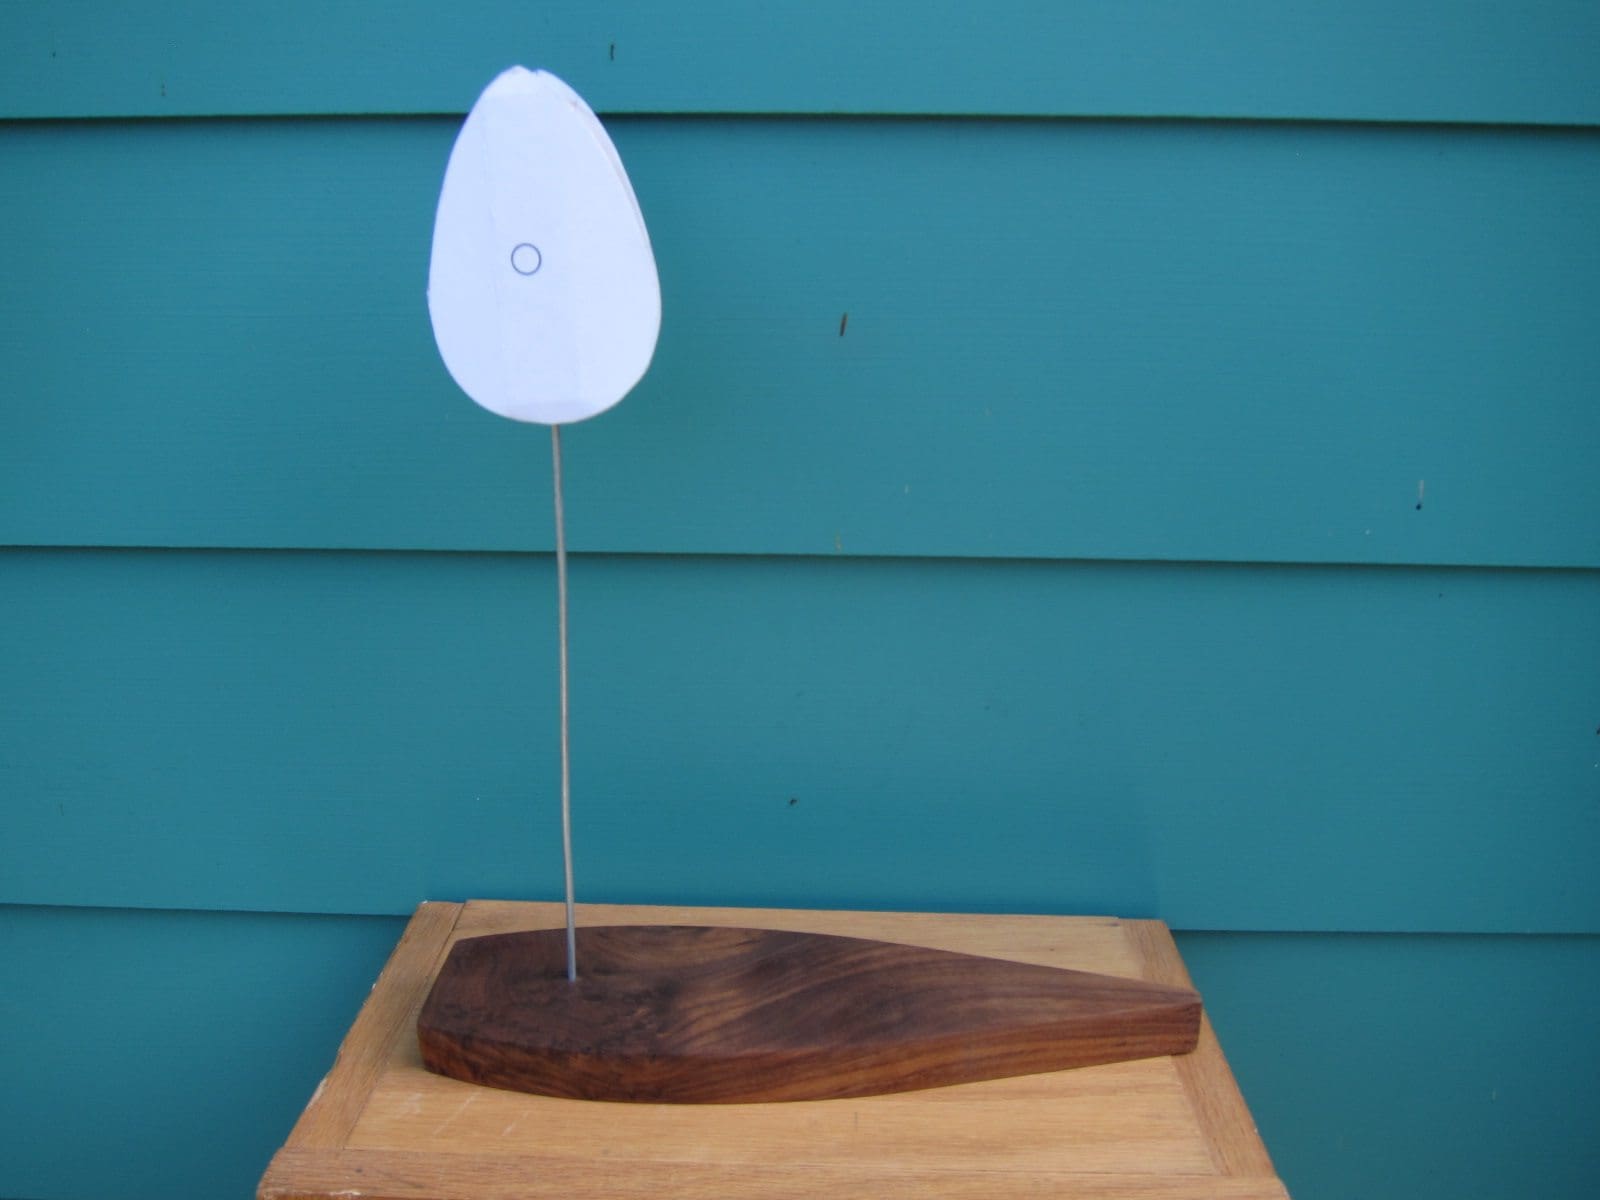
Difficult to display items may need specially constructed armatures. Look for a form that you can wedge inside the model without changing its shape. My wolfish offered me that challenge.
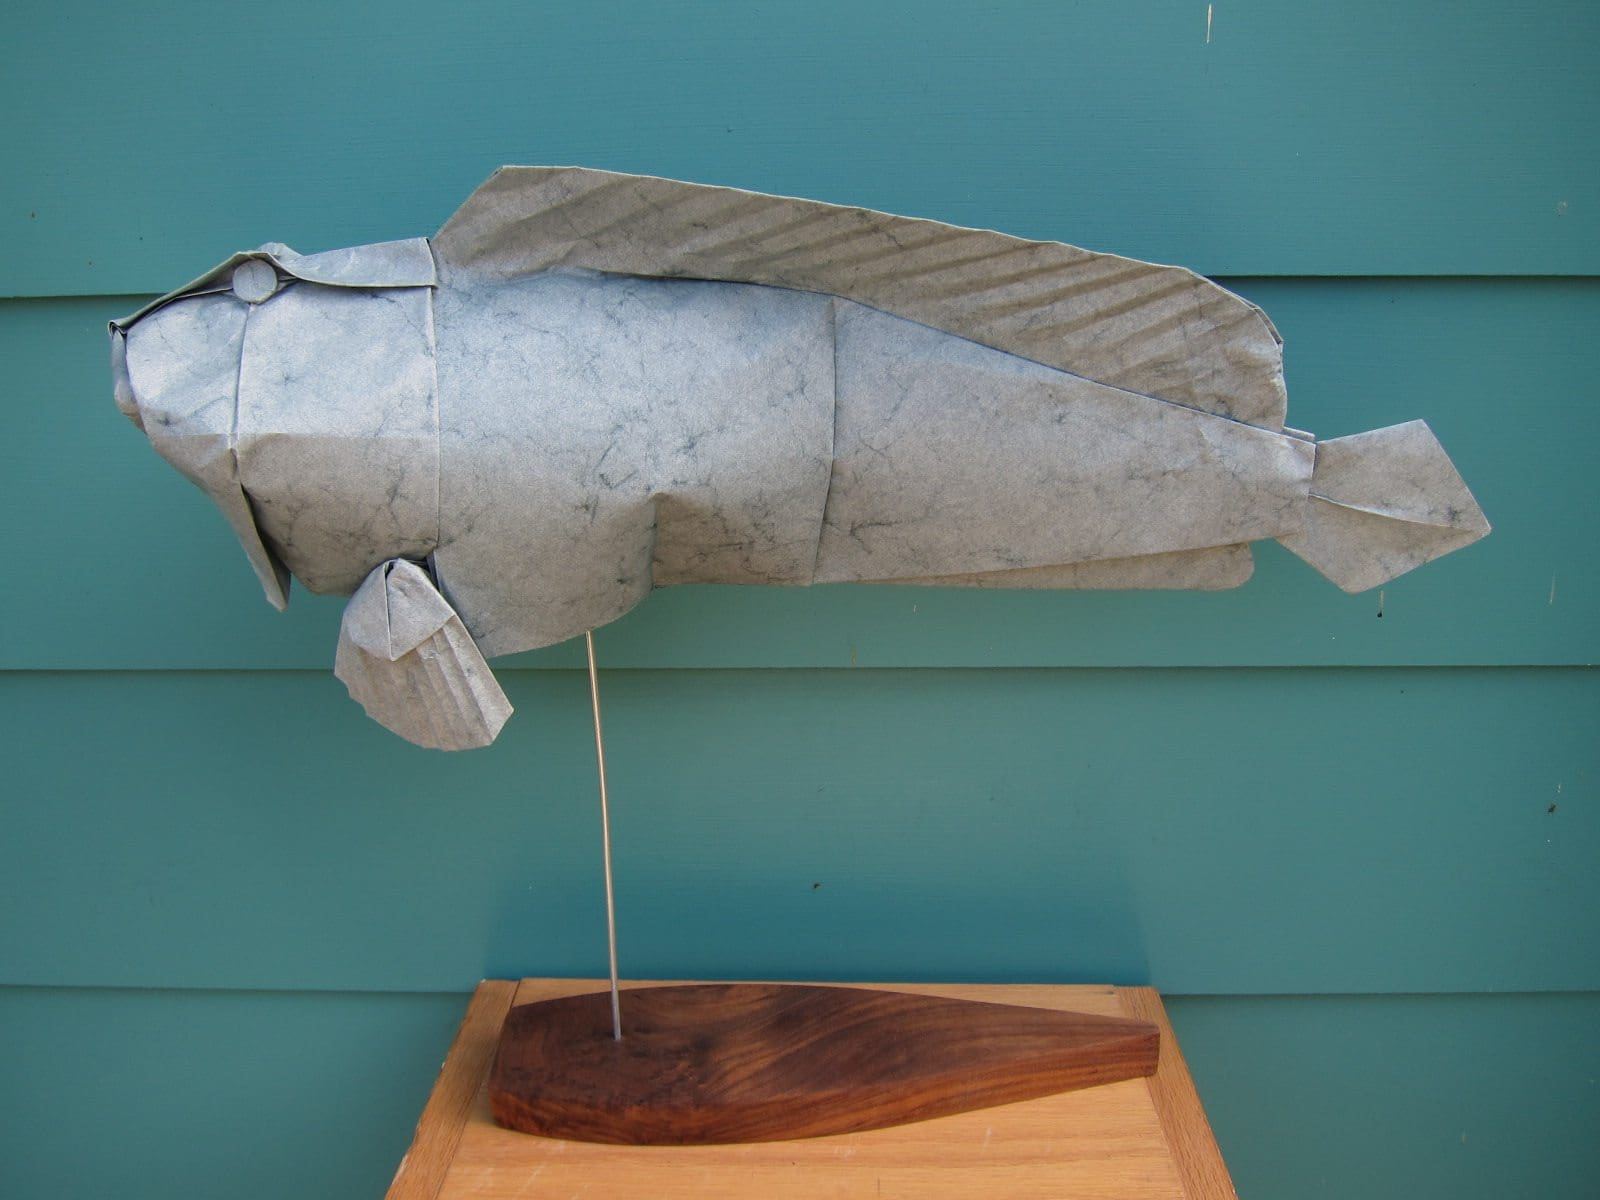
I made a cross section of its belly before I made the first fold. Later I cut this form out of acid-free board, mounted two forms on a block of wood, and threaded a wire into the end of the block to attach the forms to a base. To display the model, I insert the form into the body, and twist it 90 degrees to lock it by pressure.
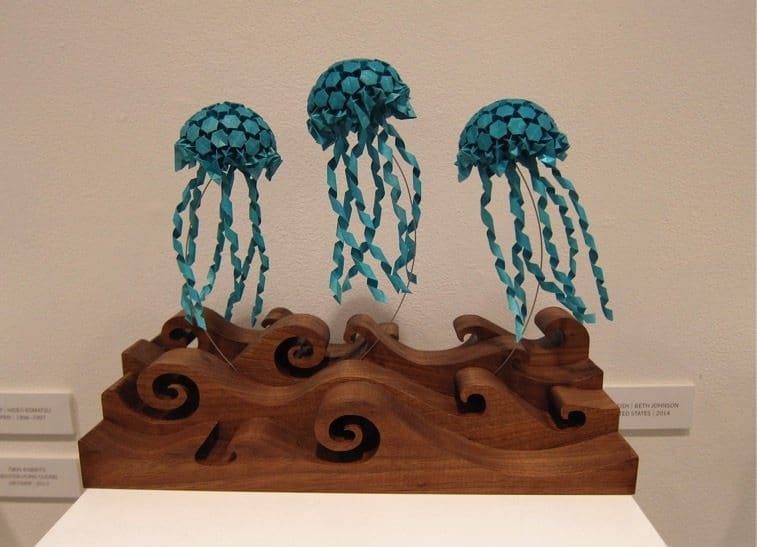
Frames and bases can either enhance or reduce the aesthetic appeal or concept of your work. Ask yourself if they improve the work, or just make it look official. Your magnum opus of up to a dozen figures tacked inside a frame may have been better exhibited as fewer pieces by themselves without the frame. Few artists spend as much time to incorporate the right base with their origami as Elizabeth (Beth) Johnson. My advice is to spend time making the right choices. Curatorial staff often want a specific look for all the display elements. In that case your well planned stands and frames may be replaced.
Provide curators with instructions on how to display your work. Use photos with captions of the process and the desired final result. This is especially important for installations with multiple pieces. For large displays, I include with my shipment a full scale map with the position of every piece clearly marked on it.
Final note: Difficult to display items get left in their boxes instead of appearing in exhibits when there is not enough time to set the exhibit up. Make the job easy for curators and exhibit installers.
PACKING
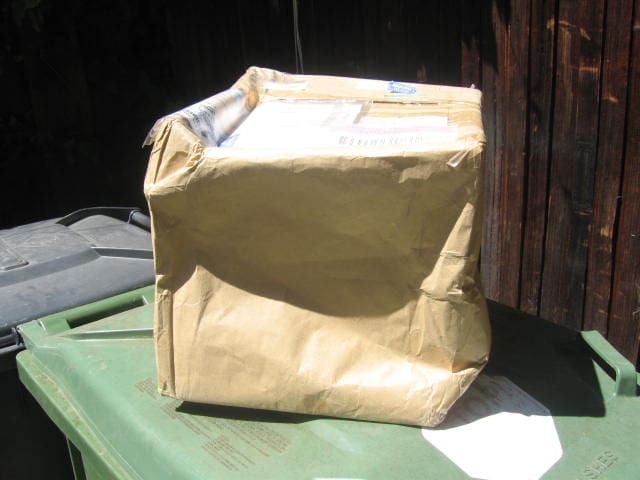
Plan your packed work to survive a gorilla tossing it around in the rain. Every designer I know has had bad experiences with the state of their creations during shipping or subsequent handling. Again, a lot of this is avoidable. The answer is having a strong box and protecting the origami appropriately within it. I will start with the box, and then describe efficient ways to suspend your origami within them. You might save the strong boxes and metal tins that come into your life for future shipments of origami. Strong plastic containers with latched lids can be purchased in a wide variety of sizes.
Make your own box when you can’t find a suitable one. I make mine from double-weight cardboard. This can be purchased in large 4 x 8 foot sheets. I try to make the box and attached lid out of one piece of cut cardboard and then assemble it. Double weight cardboard is very stiff. Plan where you want it to fold. Place a heavy ruler along the axis of these fold lines, and stroke a blunt object along the edge of the ruler with slight pressure to depress, not cut, the top surface of the cardboard. Any round edged object can be used to do this. The cardboard will bend easily along these lines. Plan carefully for the thickness of the cardboard when making these boxes.
Internal supports can greatly increase the strength of your box. A very simple method is to insert a cardboard sheet the width of the box diagonal, thereby making two triangular compartments. Or you can make a triangular shaped box. These boxes are especially strong, however your mail carrier will charge you as if it was a rectangular shape.
What happens if you don’t have double-weight cardboard? Here are two solutions. Designer Donald Moss reinforced a light-weight cardboard box for me by gluing wooden strips around all the edges inside the box.
Sometimes your creation needs a more specially constructed box. I have spent more time making a box for a sculpture than the sculpture itself. Robert Lang taught me a technique he was taught by a professional art shipper. Make your box out of glued sheets of foamcore. Then wrap these with cardboard for shipping. If you wrap them too tightly you will not be able to easily remove the foamcore box from the cardboard one.
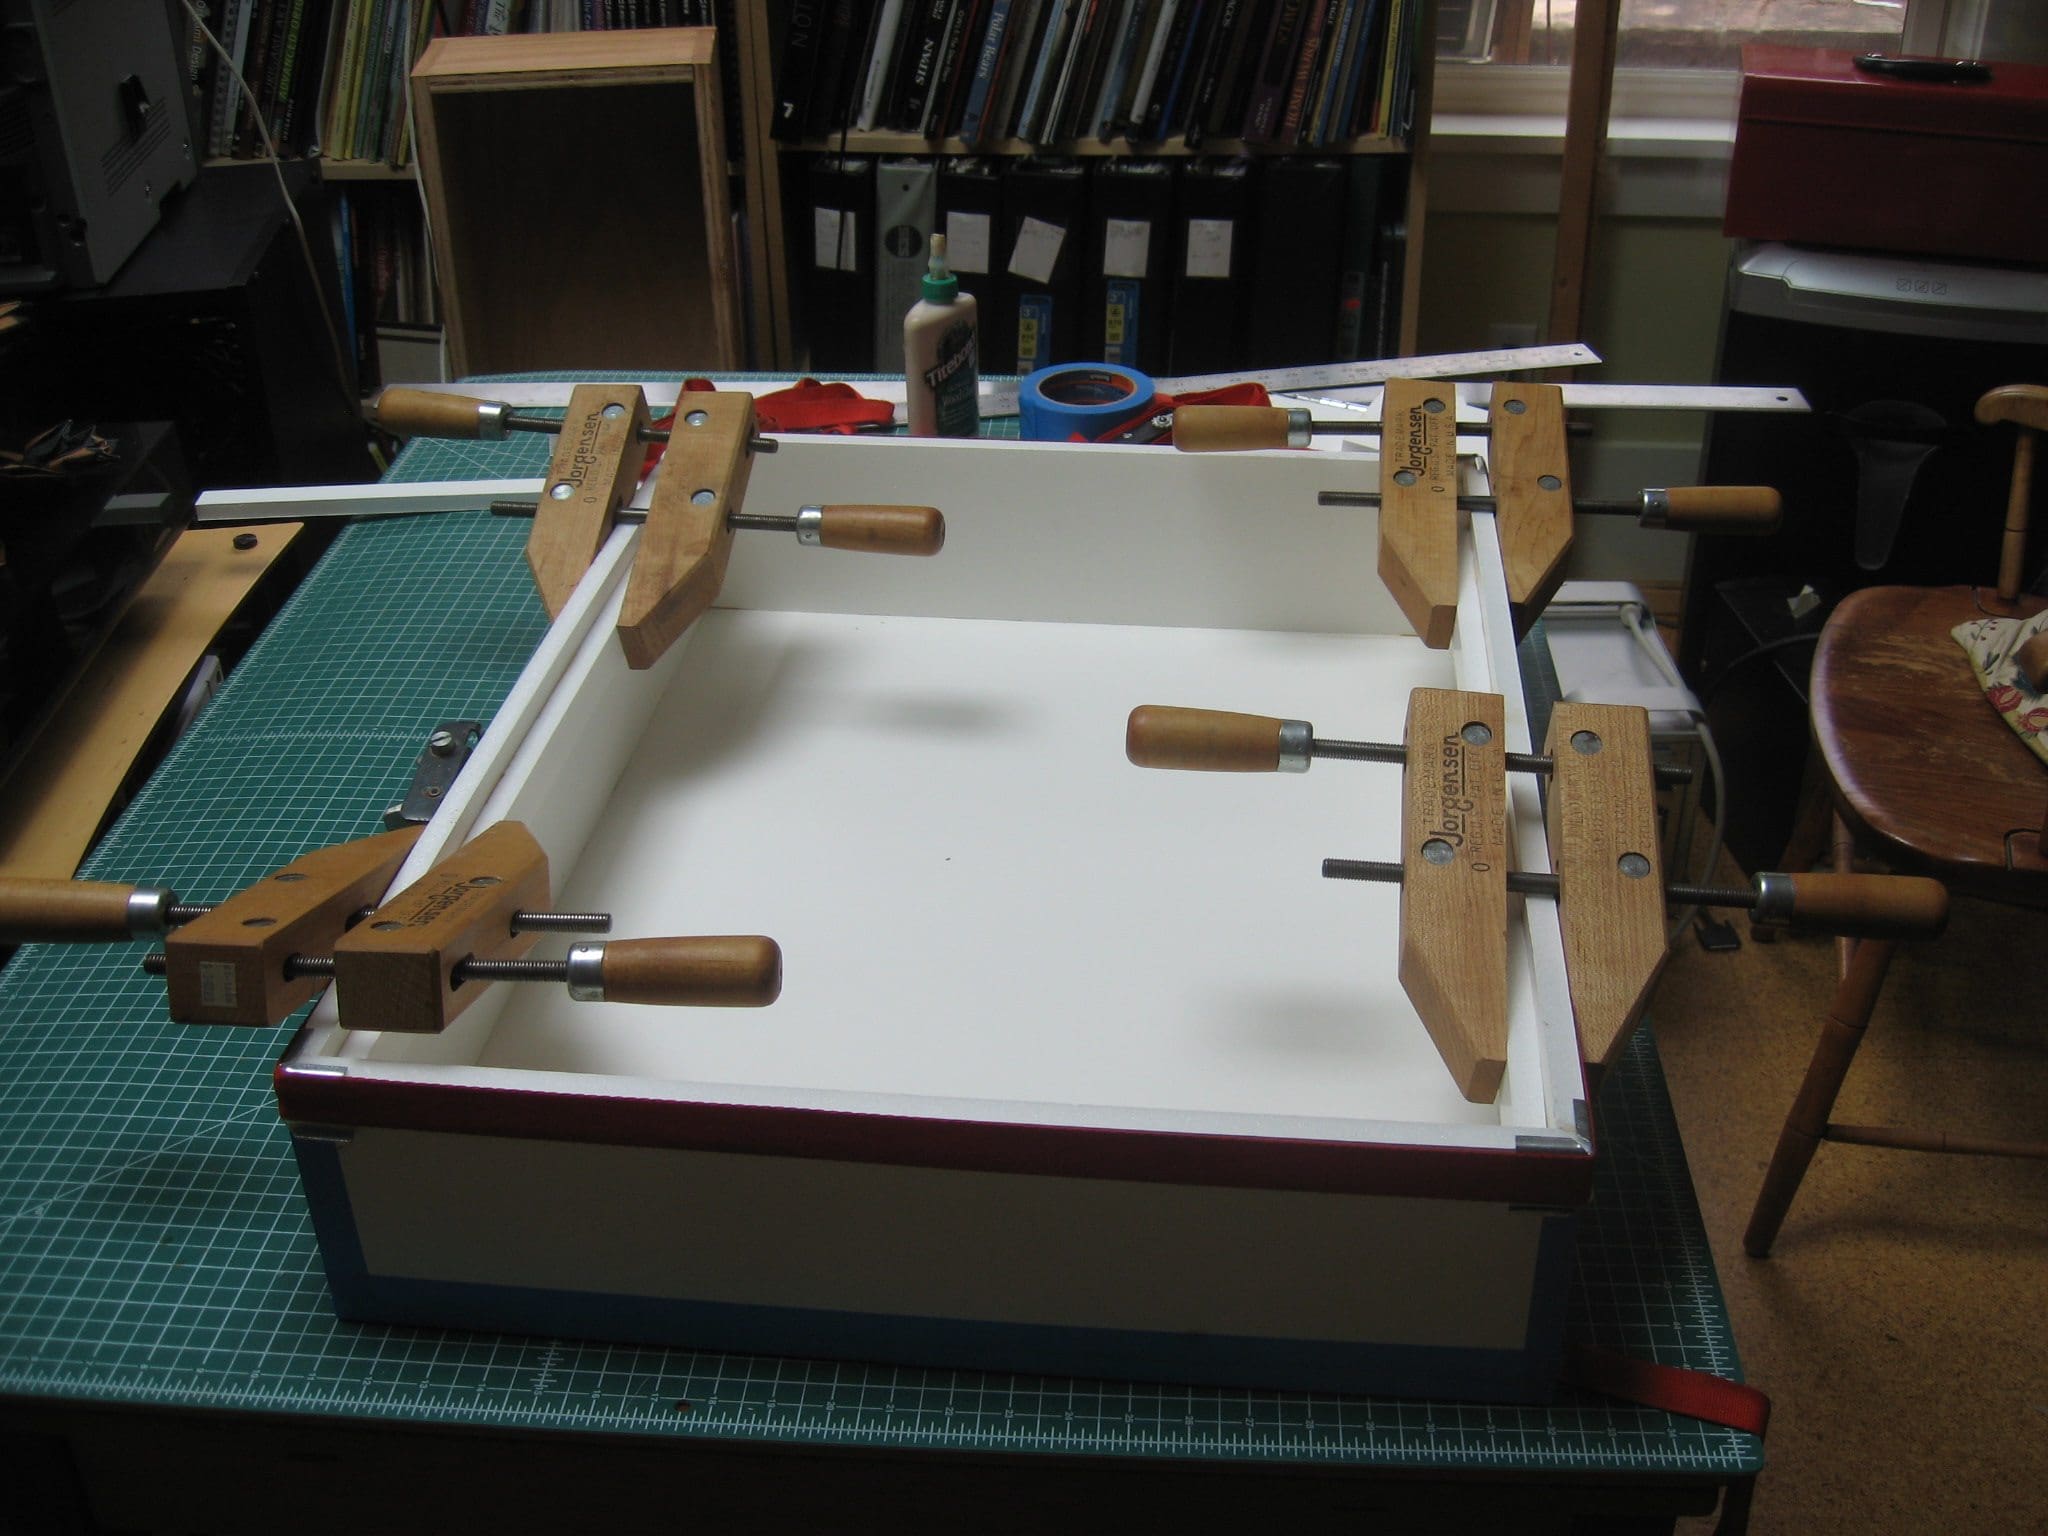
Foamcore is light and strong. Robert taught me to use 1/2 inch thick white sheets that come in sizes up to 4 x 8 feet. First plan the sizes of the pieces that will be glued together to make the box. Pay attention to the thickness of the material when making your calculations. Excess strips can be made into supports for the corners and lid of the box as in the photograph above. To cut it accurately you need a steady hand, a good metal ruler (preferably heavy to prevent slipping), and a very sharp knife blade such as one from the brand “xacto”. I replace blades often when making these boxes. Make many shallow passes with the knife blade against your ruler instead of trying to cut through the foam core with one pass. Pay particular attention to make the cut perpendicular to the surface of the foamcore. Once a stroke ends up on the wrong path or axis, it is difficult to remedy with this material. The pieces of foamcore can be glued together with white glue, wood glue, or with a glue gun.
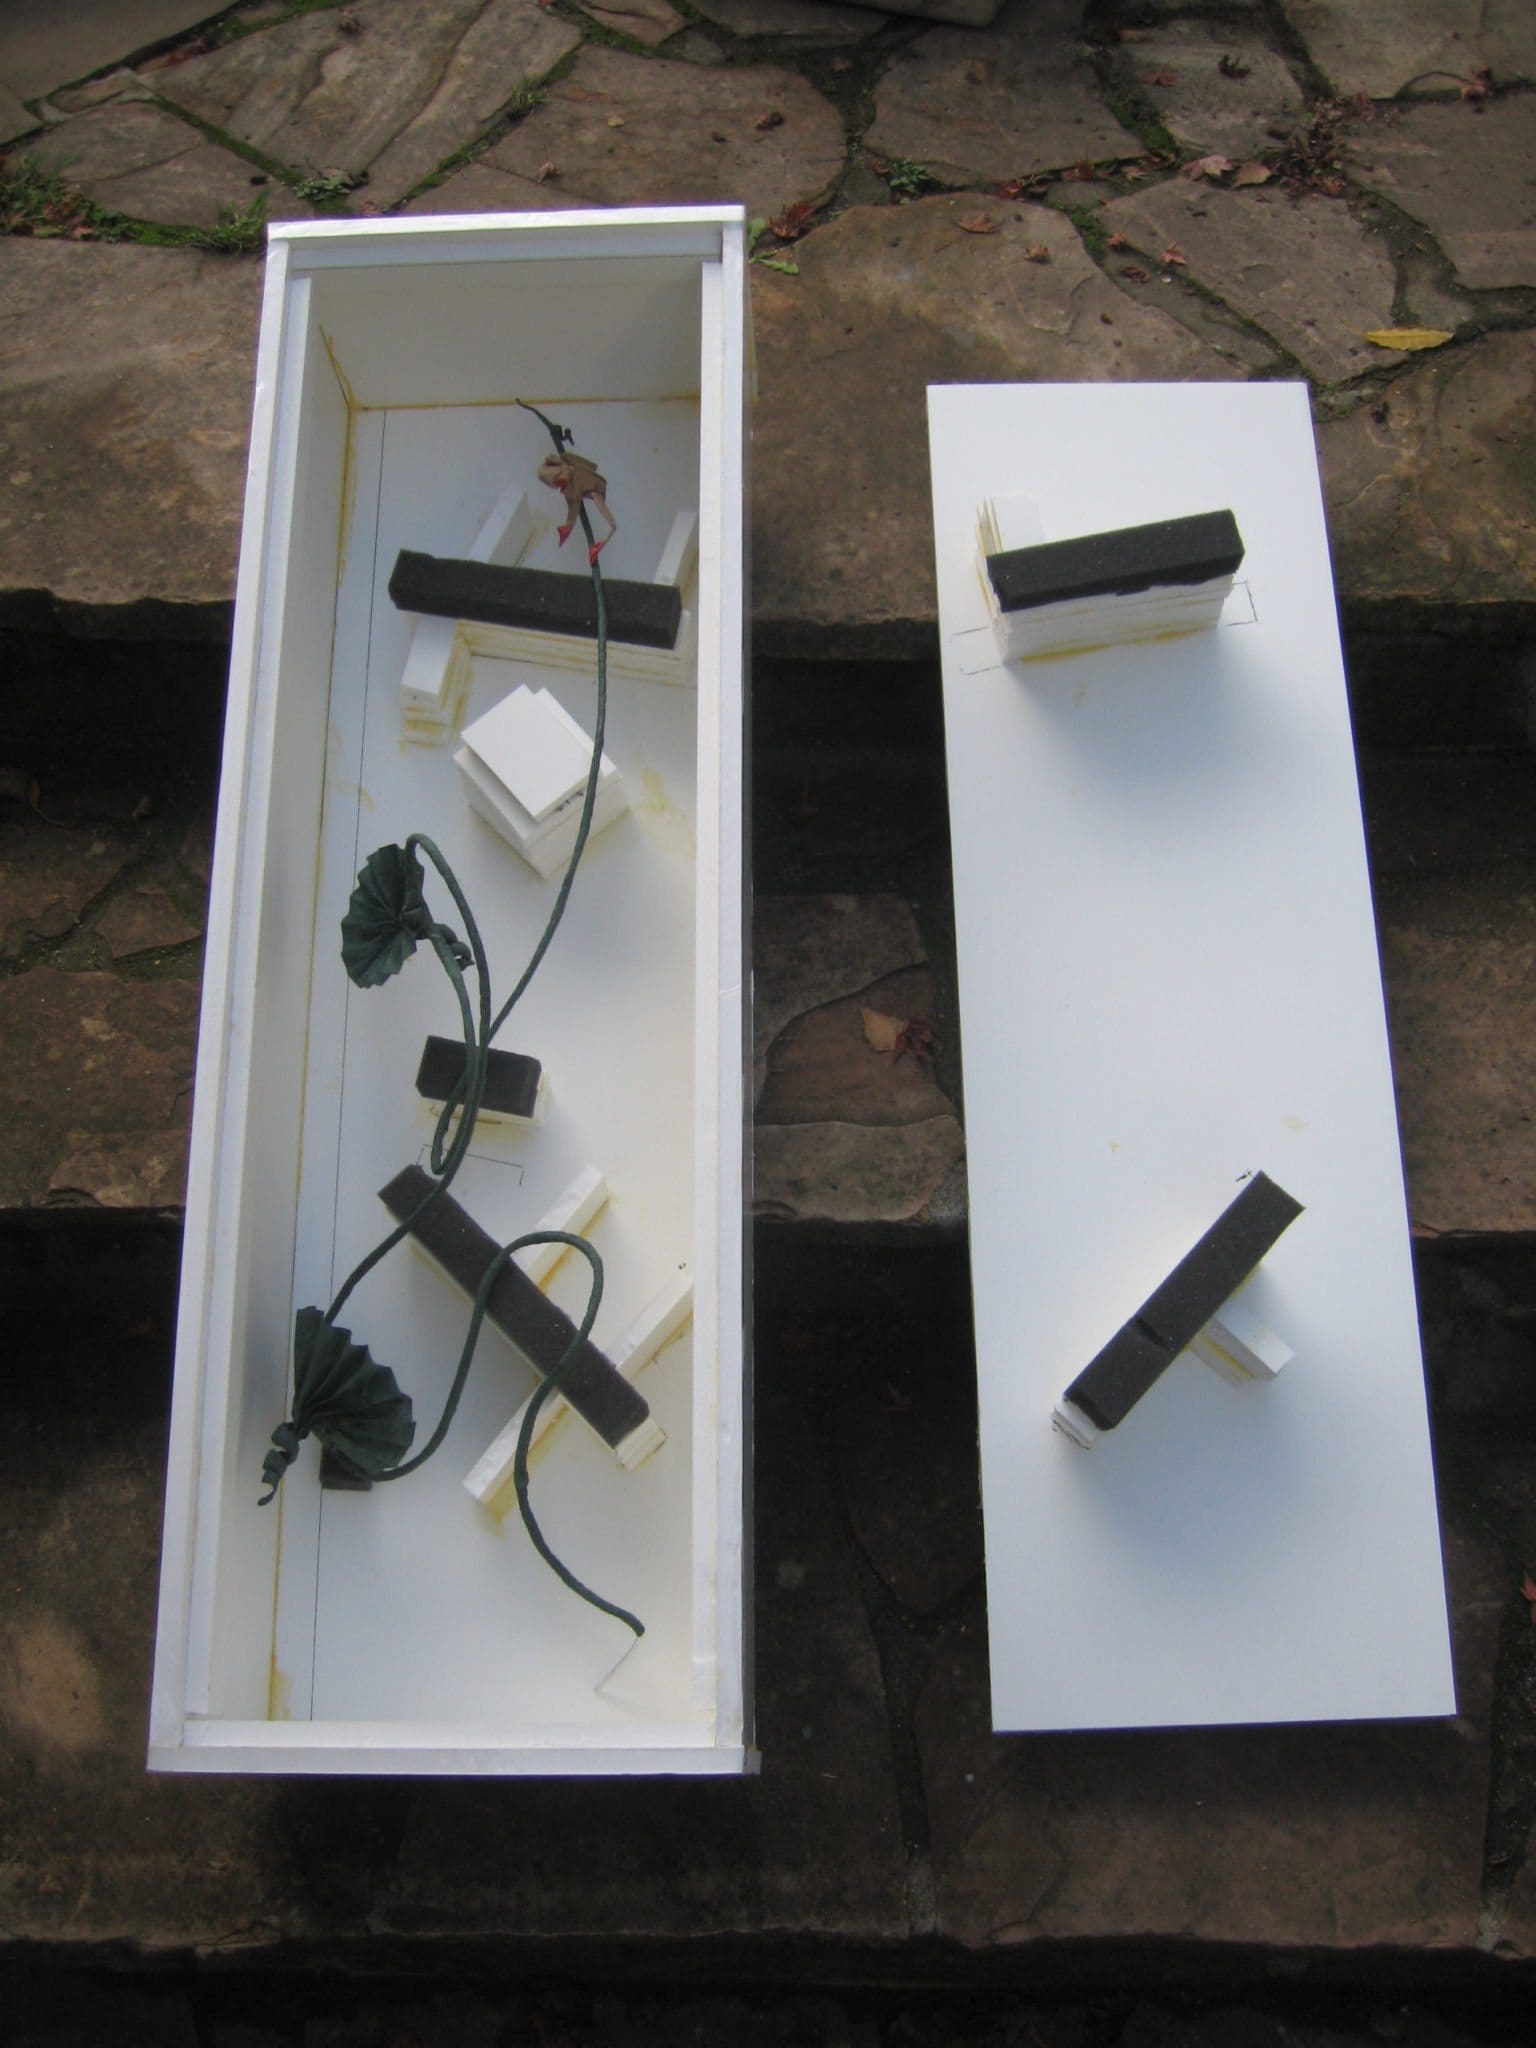
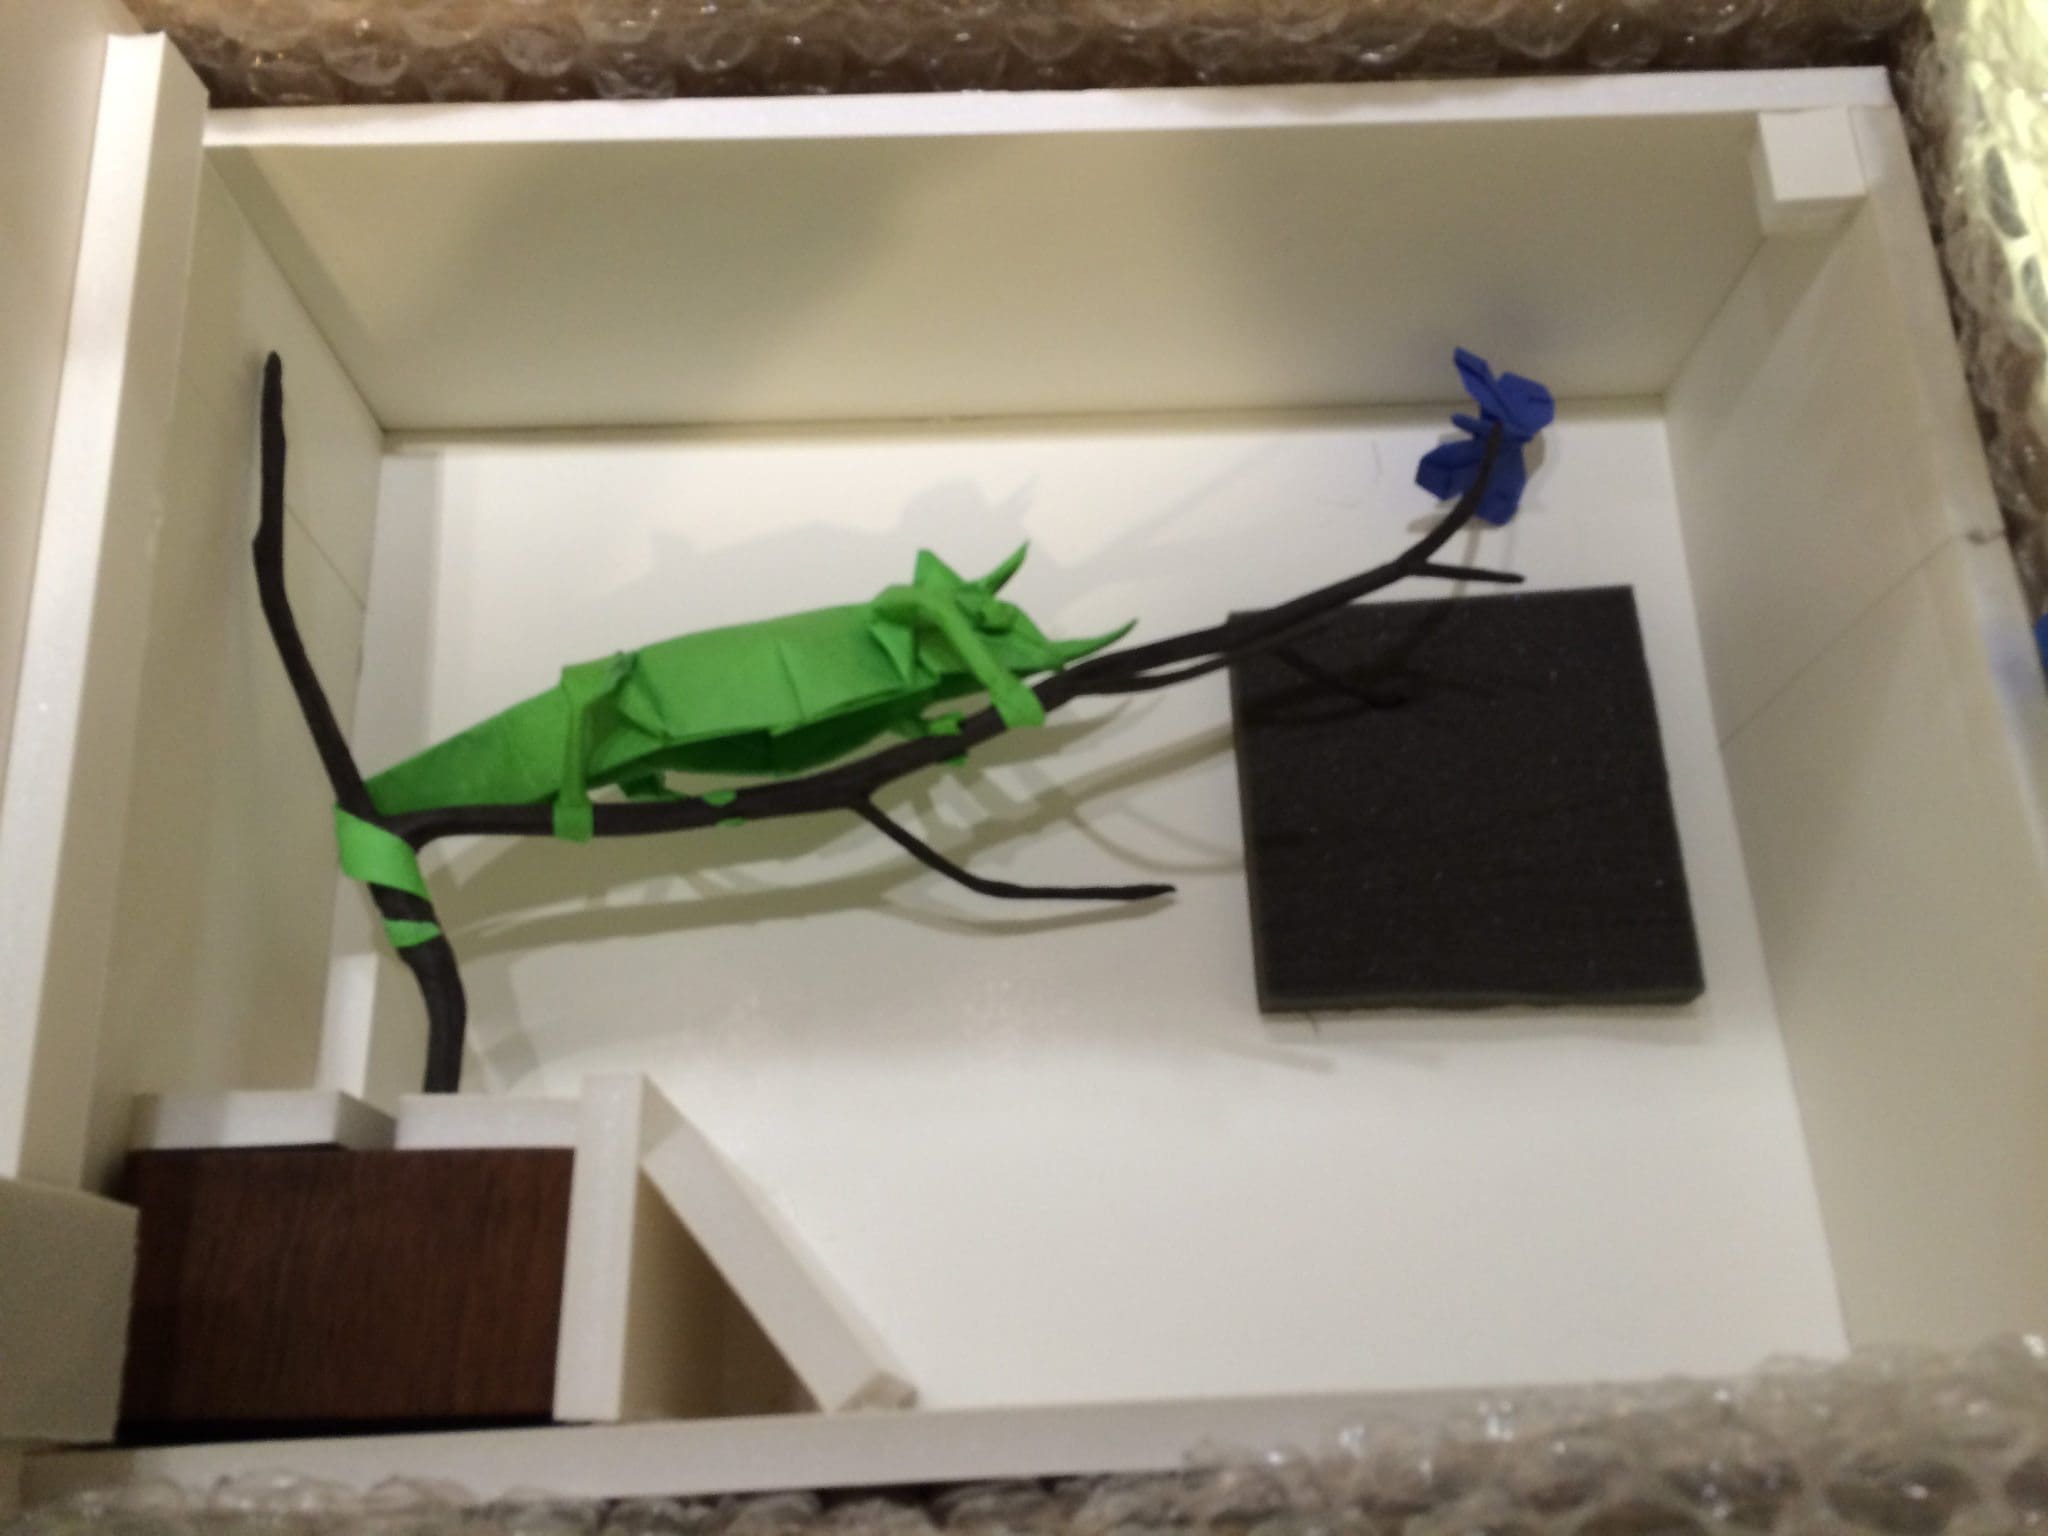
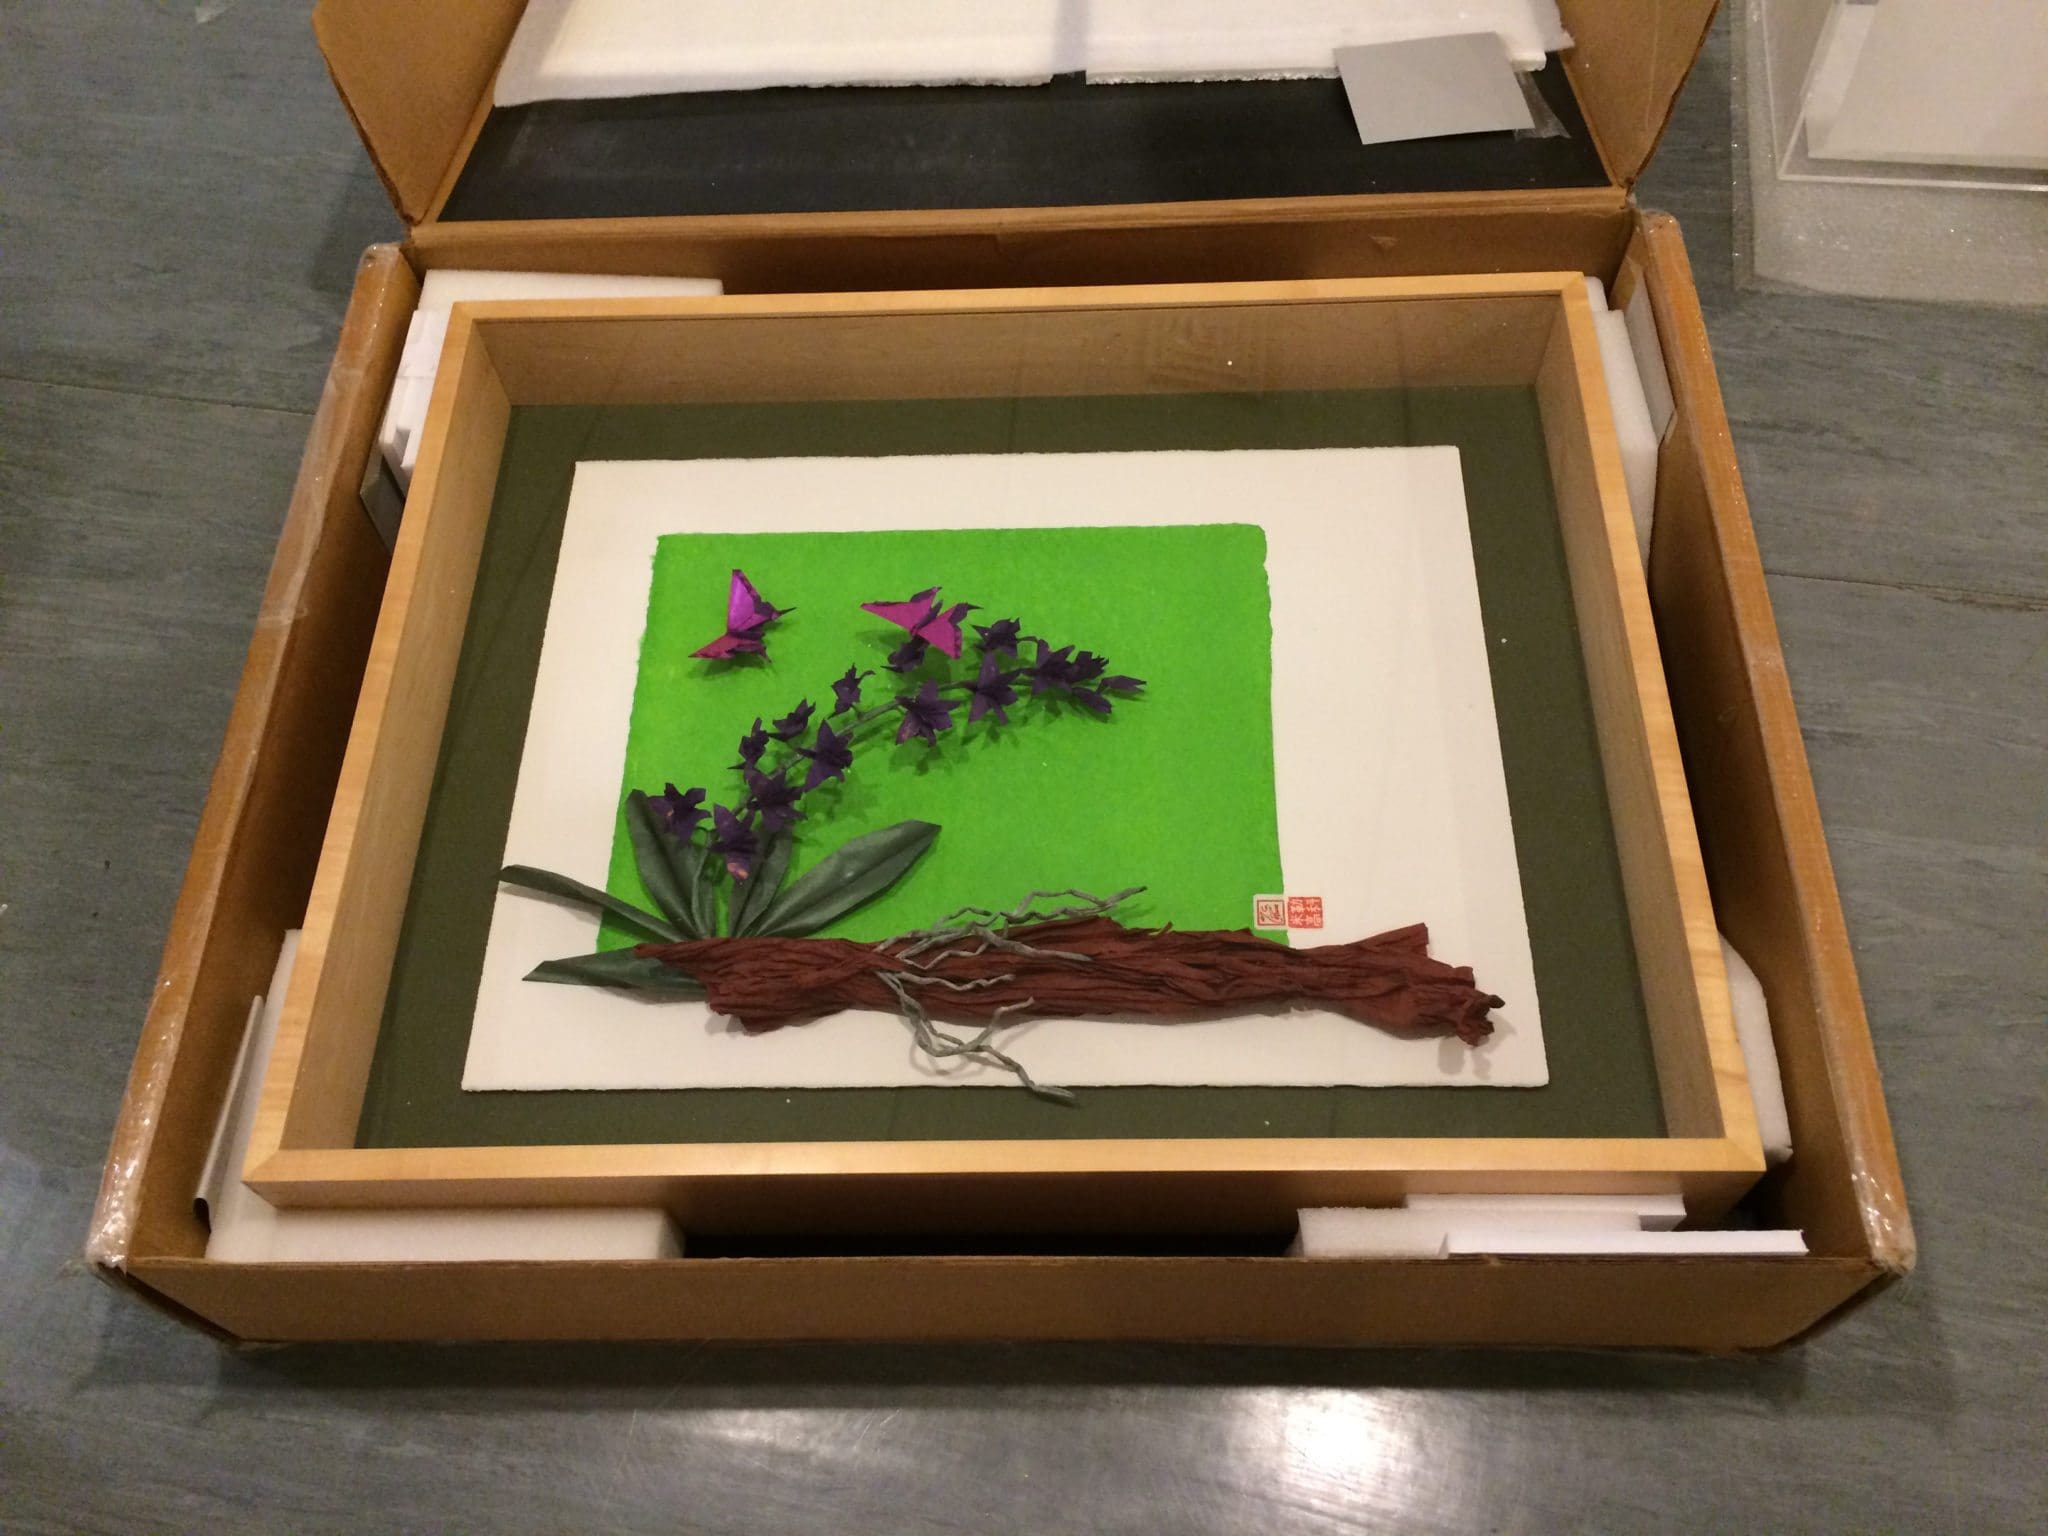
A prudent rule is to leave two inches (5 cm) of space all around your origami in these enclosures. If the base is not attached permanently to the model, pack each in separate boxes. I have had bases become loose in transit and crush the models inside the same box. I glue a picture of the model on the bottom of the base it goes on to avoid bases ending up on the wrong sculpture.
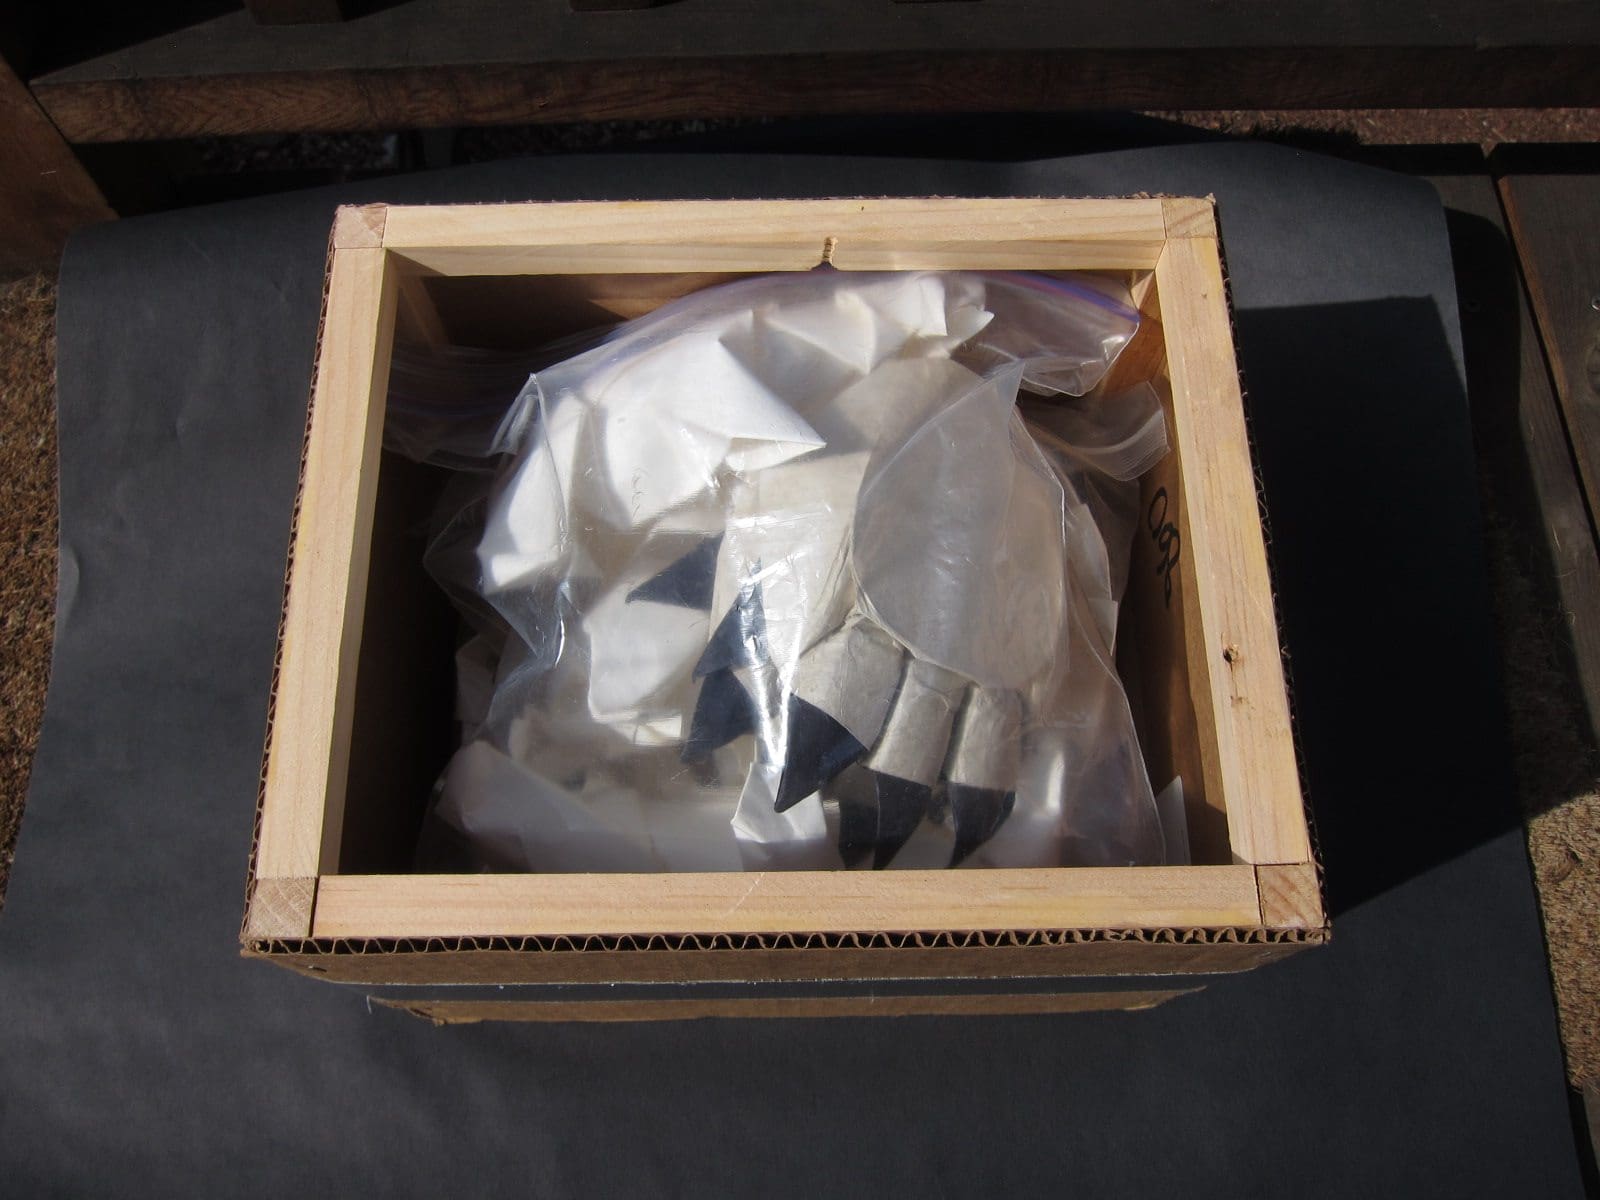
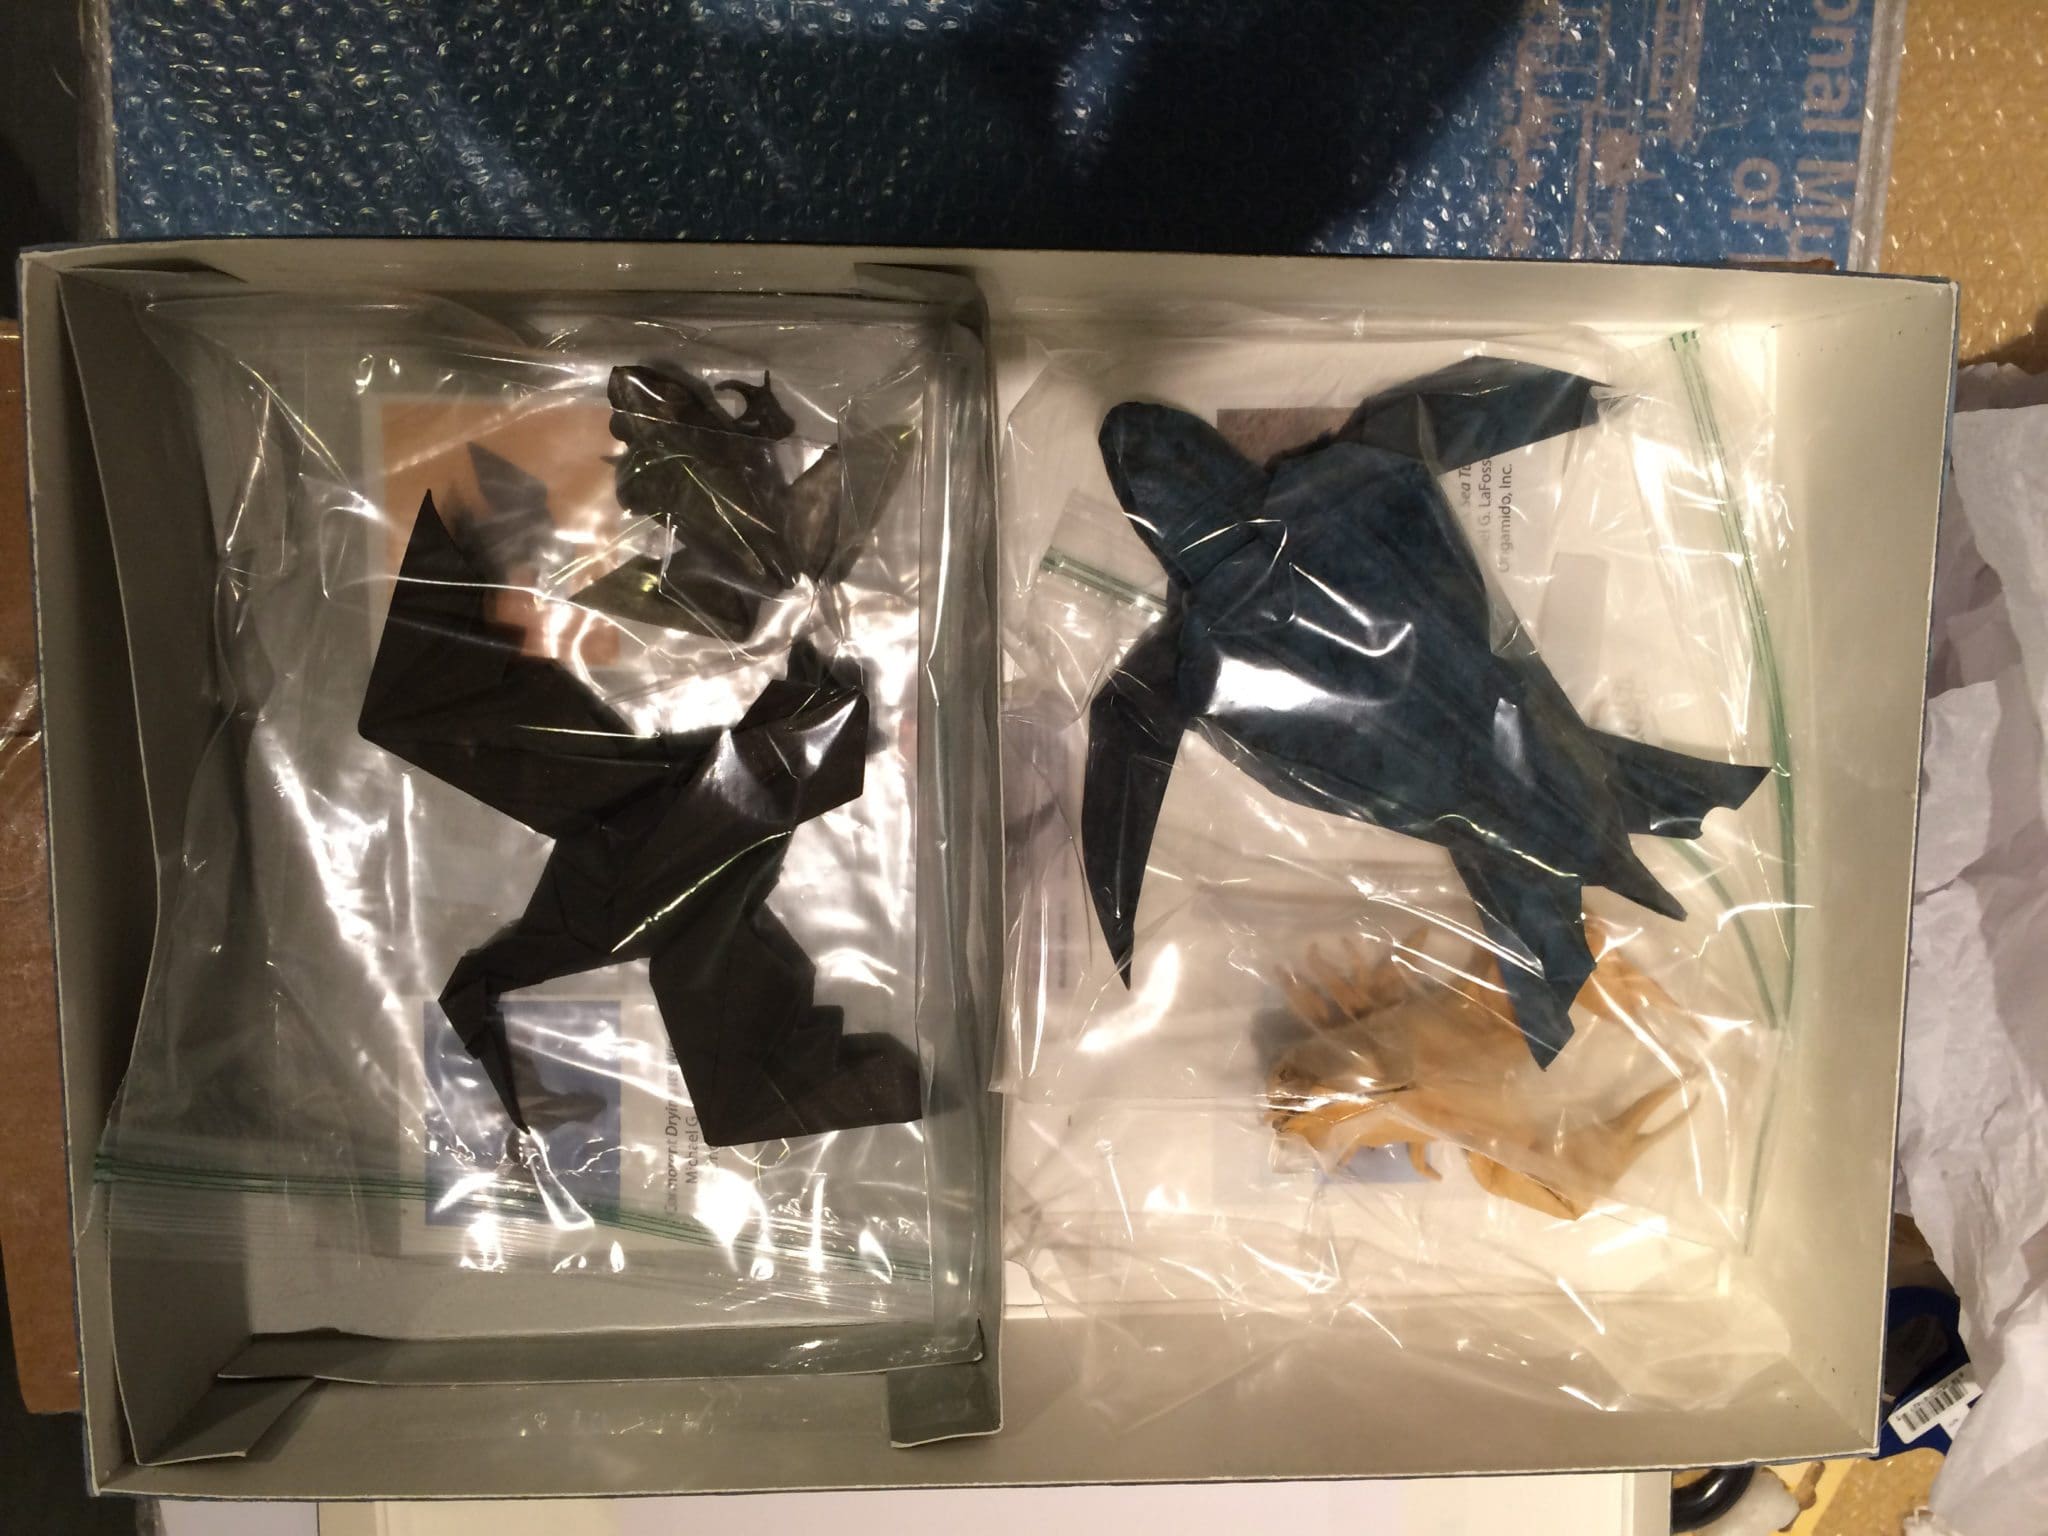
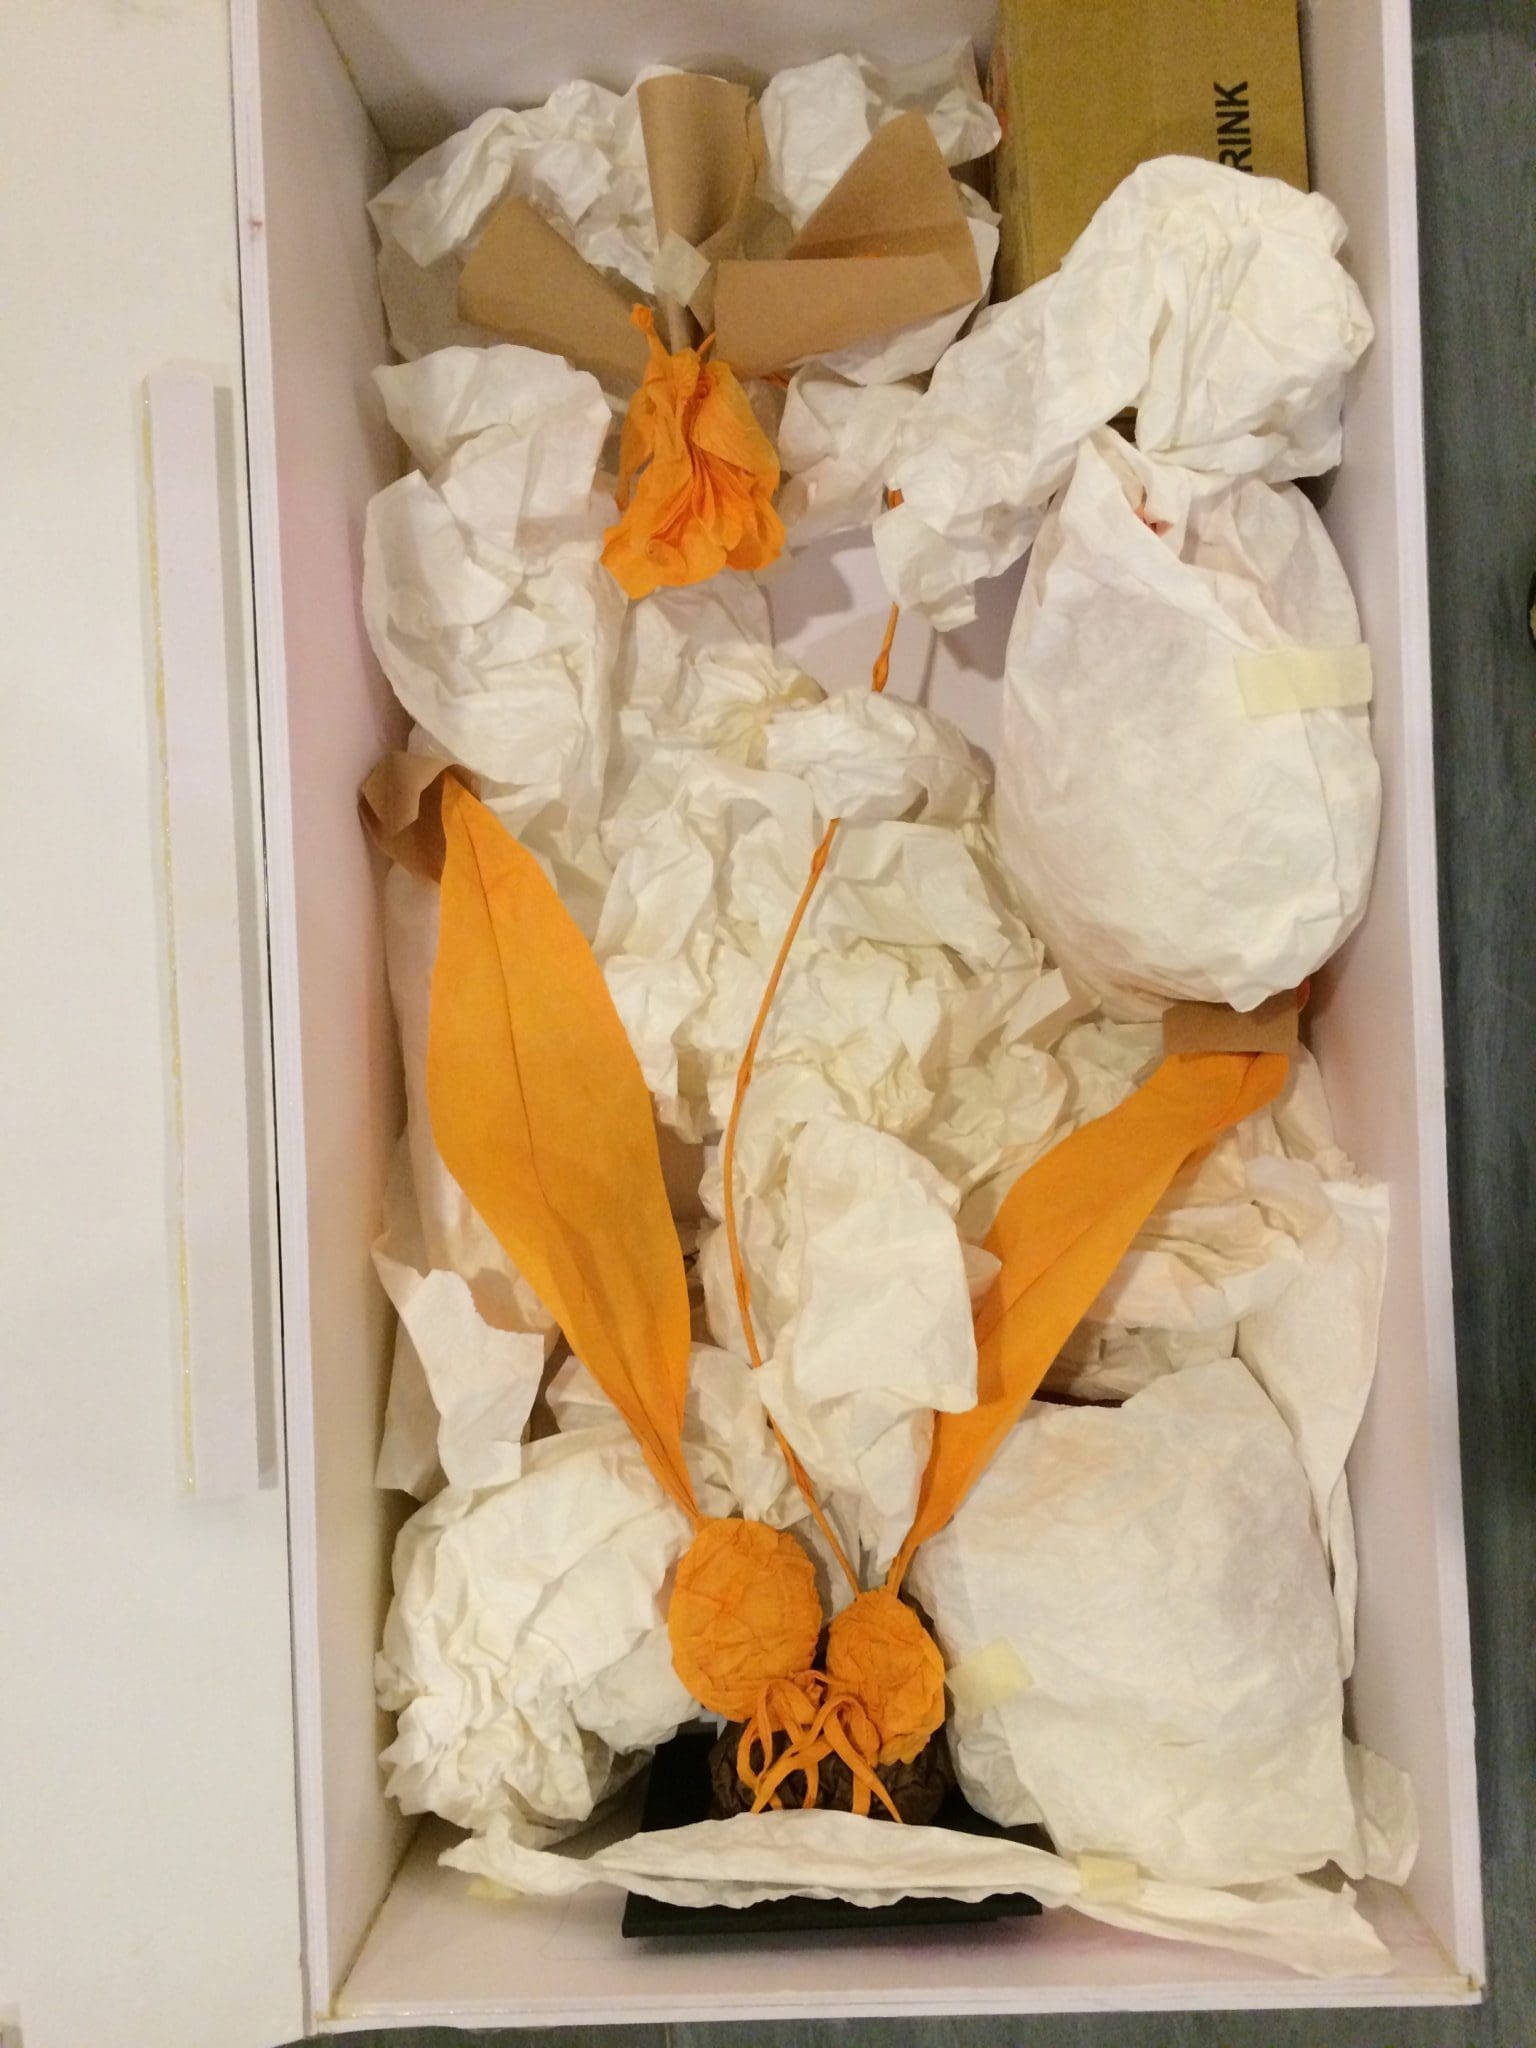
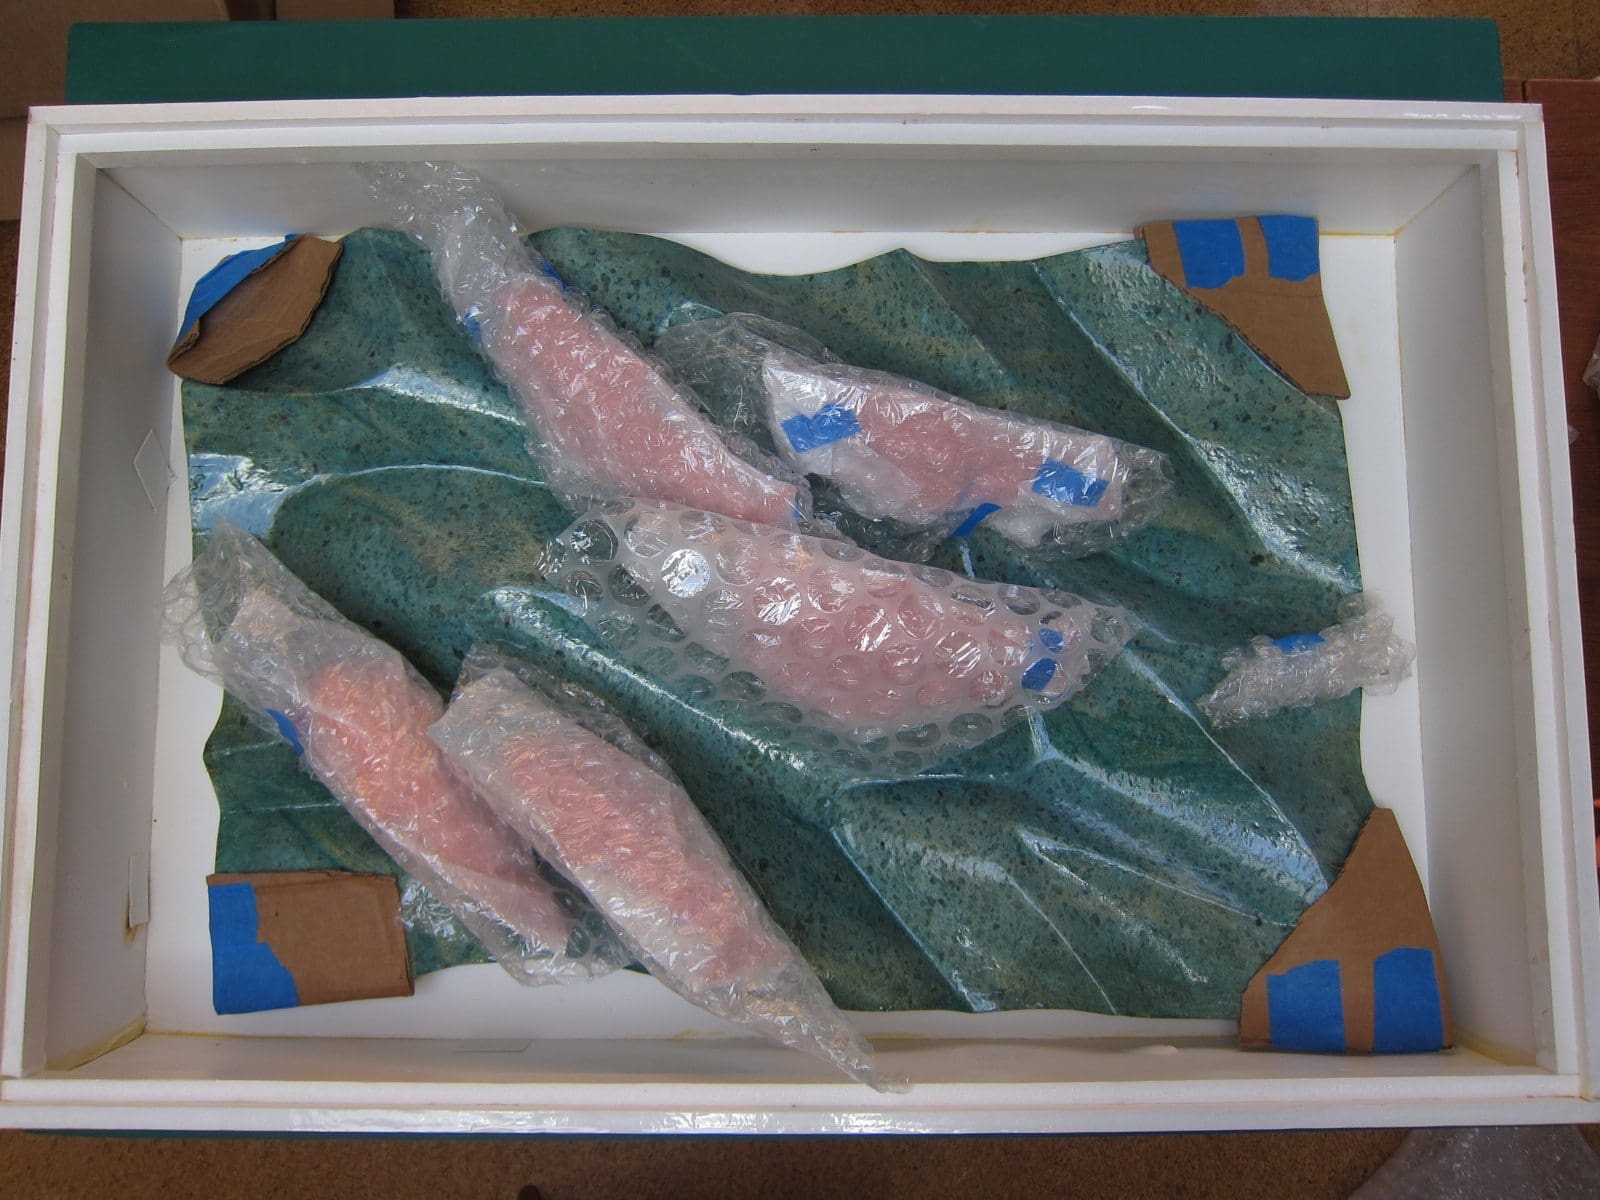
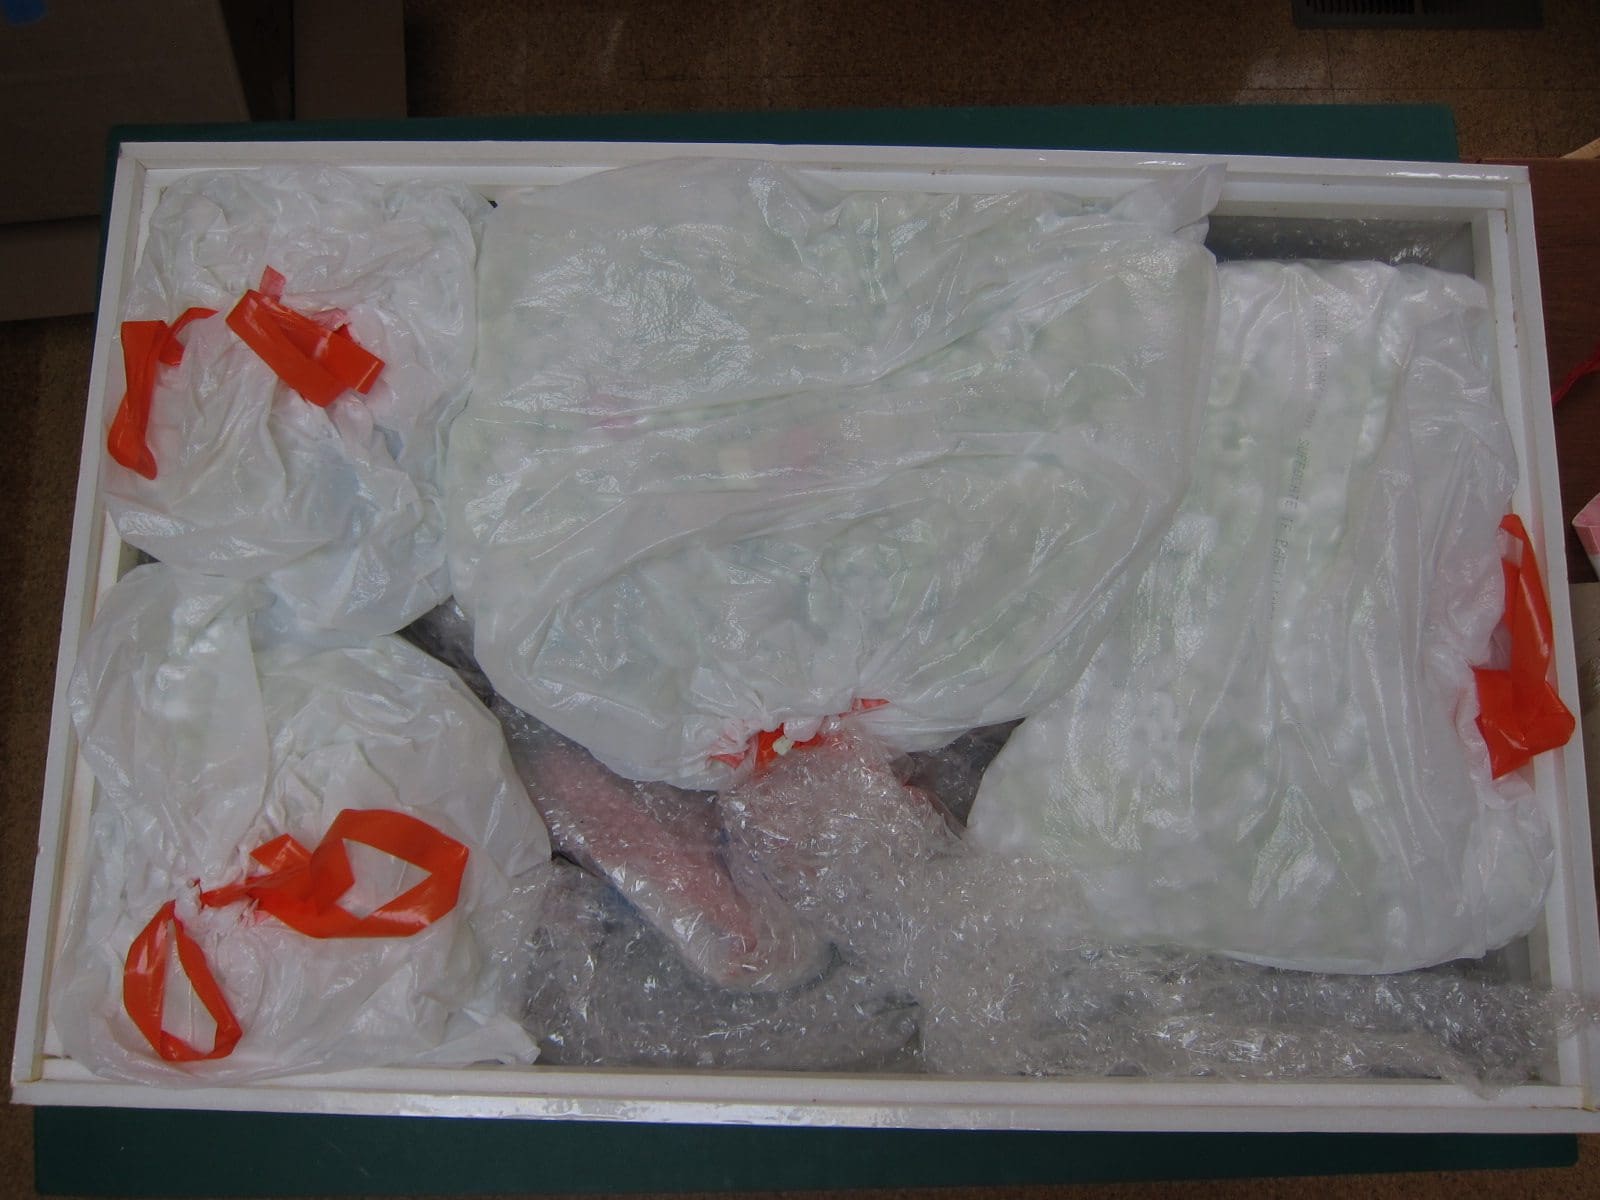
Do not pack masses of origami together. Keep items separate. Models that are not attached to bases need additional protection. I often wrap each piece in acid free paper and then a layer of bubble wrap. I secure the bubble wrap with modern painter’s tape that is not too sticky. Do not use tan masking tape on tissue paper or bubble wrap. This tape is hard to remove from packing materials. The packing material can thus be ruined for repacking for shipping artwork back to the artist.
Joseph Wu taught me to place models inside their own plastic zip-lock bag with a little air and then stack them loosely in boxes. I often stuff body cavities with acid-free paper or cotton to protect them from being crushed. I put all appendages I don’t want bent into protective sleeves. A folded-over piece of acid-free cover stock with taped edges works well for sleeves.
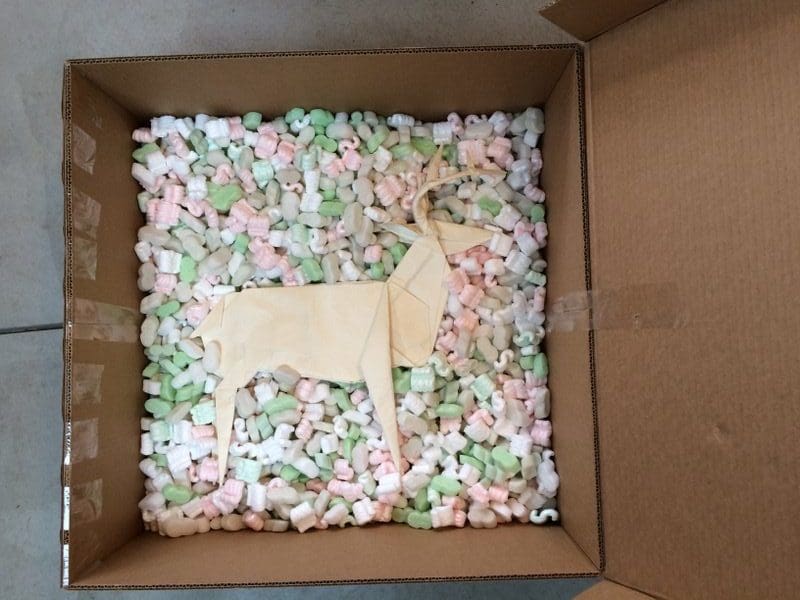
Crushed up paper provides adequate space filler for most purposes, If you use newspaper, wrap the origami to prevent newsprint ink from marking it. Alternatively, one can use styrofoam peanuts and suspend the origami within it. Be considerate to the person that must extract your origami by packing a big plastic bag under the lid of the box. The peanuts can be poured into the bag while the origami is removed. I place peanuts in bags. These bags can be configured to take up the space and cushion my bigger models.
Provide instructions for people to pack and unpack your models if you will not be present to do it yourself. Do not assume that someone else can recreate your good packing job. Curators and installers greatly appreciate written instructions and pictures of each step for unpacking and/or repacking. This is especially important for artworks with multiple pieces that require some assembly before displaying. Try to make the packing and unpacking easy to do. As curator I have encounter a mass of cardboard pieces that exactly fill up the space between individual boxes with the origami. Curators have little time to recreate this puzzle when re-packing, regardless of instructions.
SHIPPING
Plan your shipping boxes to be reused. They should be easy to unpack and pack without cutting too much of the tape that holds them together. One of the worst packing jobs for reuse is to place your strong box inside a plastic bag with the address on it. The plastic bag can not be reused once it is ripped to get at the box inside. Don’t use heavy staples to adhere box flaps together.
I cover the surfaces of my boxes with tape that will be further taped to close the box. The cardboard is not torn when this later tape is removed to open the box. Likewise I tape the surface where the shipping address and invoices go. When it comes time to send the box back to me or to be sent somewhere else, the old shipping documents can be torn off without tearing the cardboard, and new ones put on. As a courtesy to exhibitors, I include a sheet inside the box with my return address and instructions to use it.
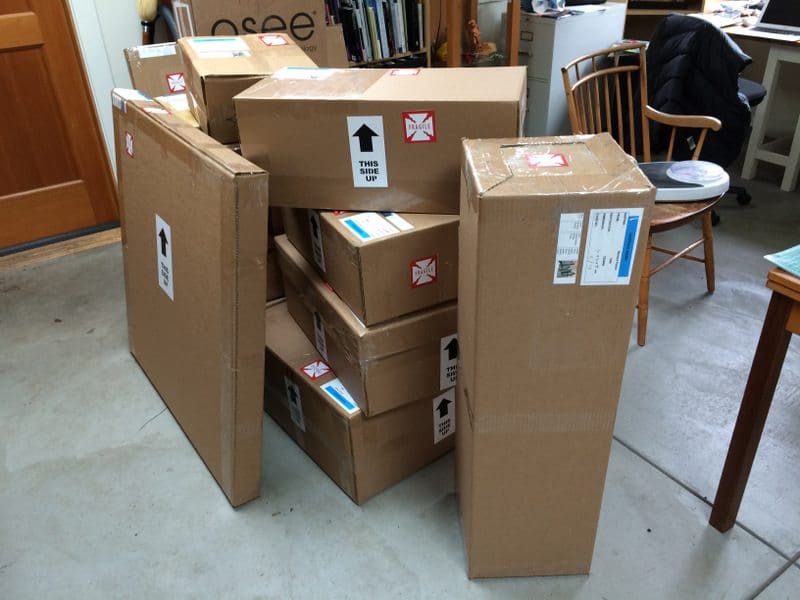
Lastly I put “Fragile” and “This Side Up” signs and symbols on the box. This can be hopeful at best. I have seen large flat screen TVs fall on my boxes. I also put a small picture of the artwork that is in the box on the top surface near the shipping mark. The shipping mark is provided by the carrier. It identifies the shipper, the country of export and import, and the number of boxes in the shipment [e.g., 1/5 means box number 1 of 5 boxes in the shipment]. Both are visible on the boxes in the picture above.